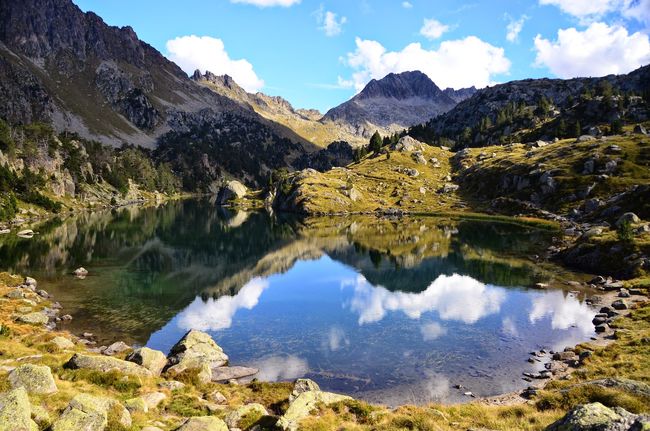
David Hockney-
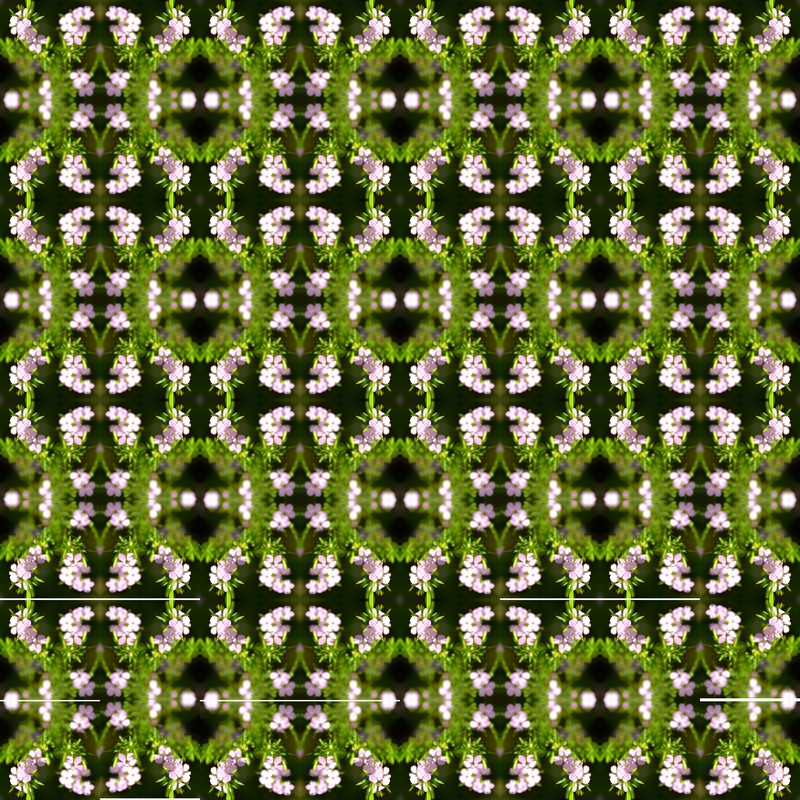
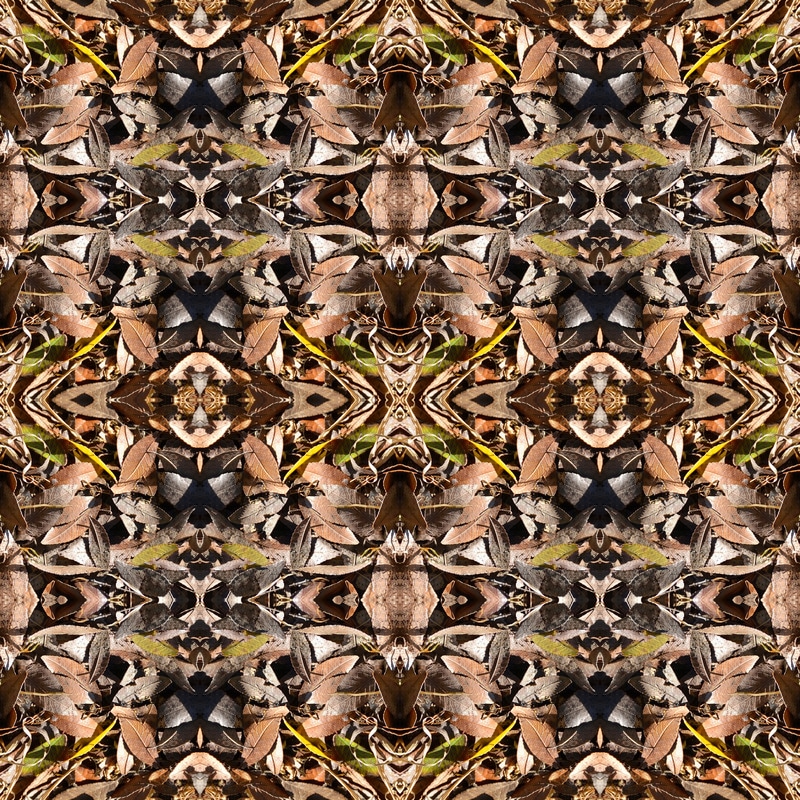
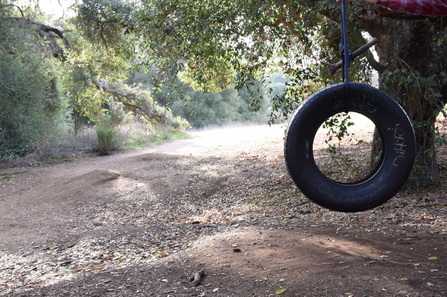
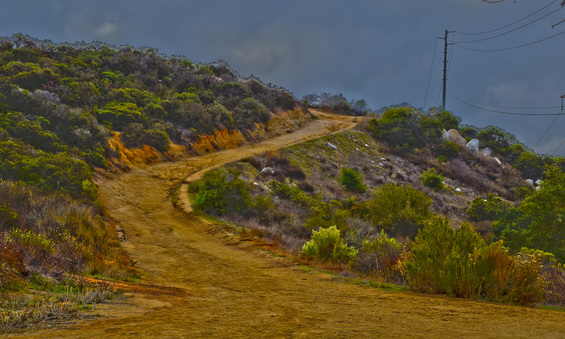
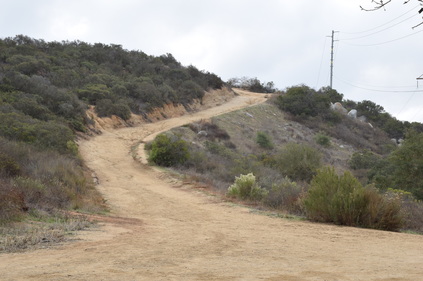
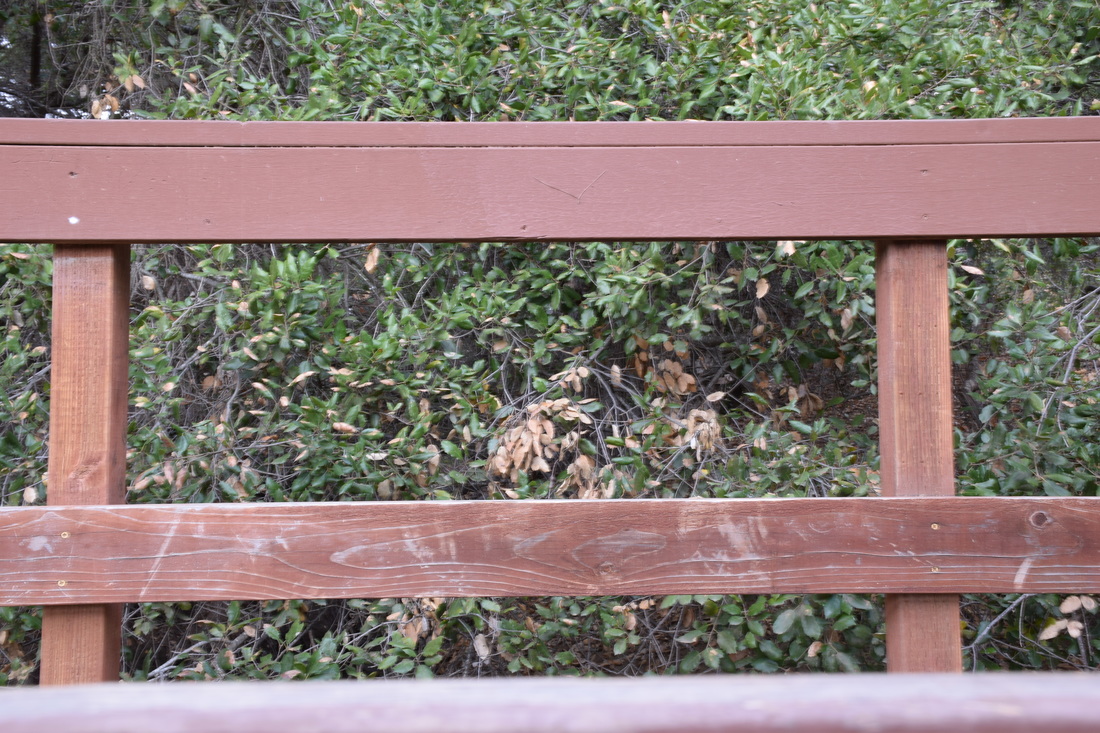
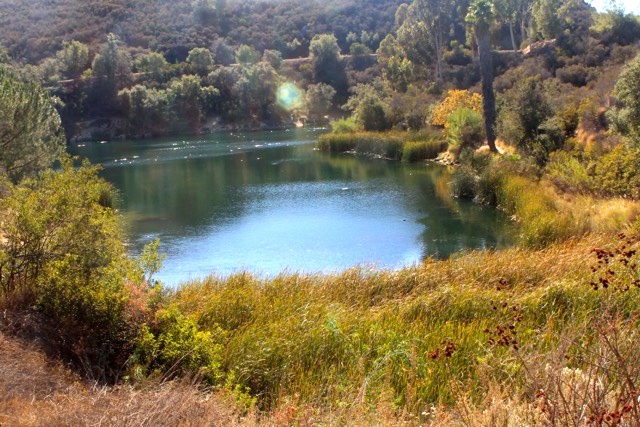
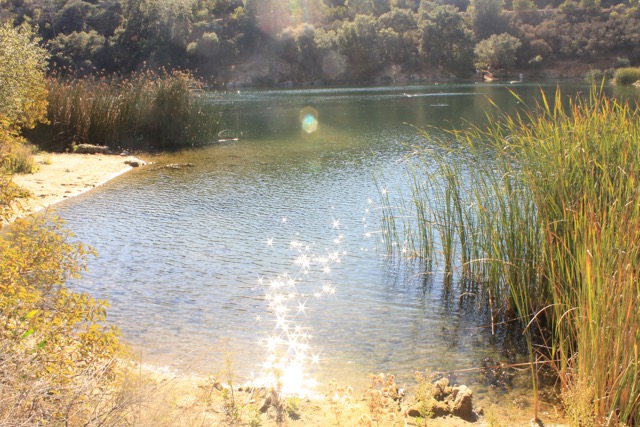
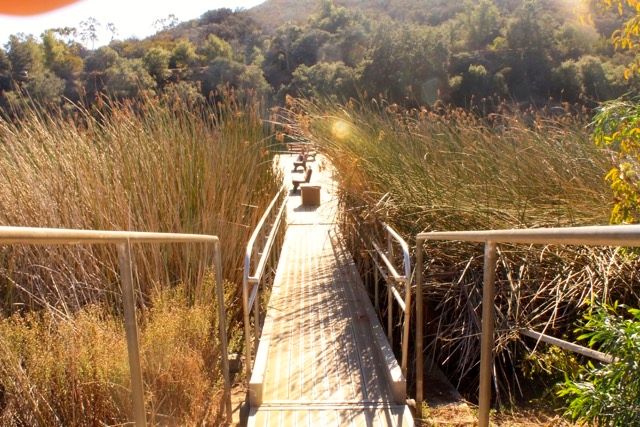
Symmetry
Leading Line
David hockney was born on july 29, 1937 in Bradford, United Kingdom. He is an english painter, printmaker, photographer, stage designer, and draughtsman. He is known for his semi - abstract paintings back in 1961. His work also involves famous photo collages with polaroids which he arranged to make on picture perfectly. Hockney a versatile artist activates the viewers in process of his work on iPads, iPhones, Computers and more.
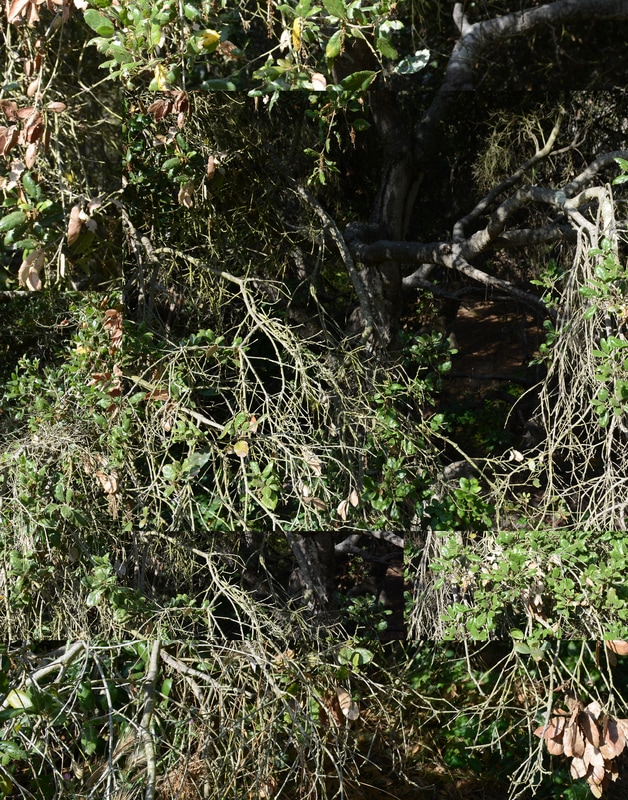
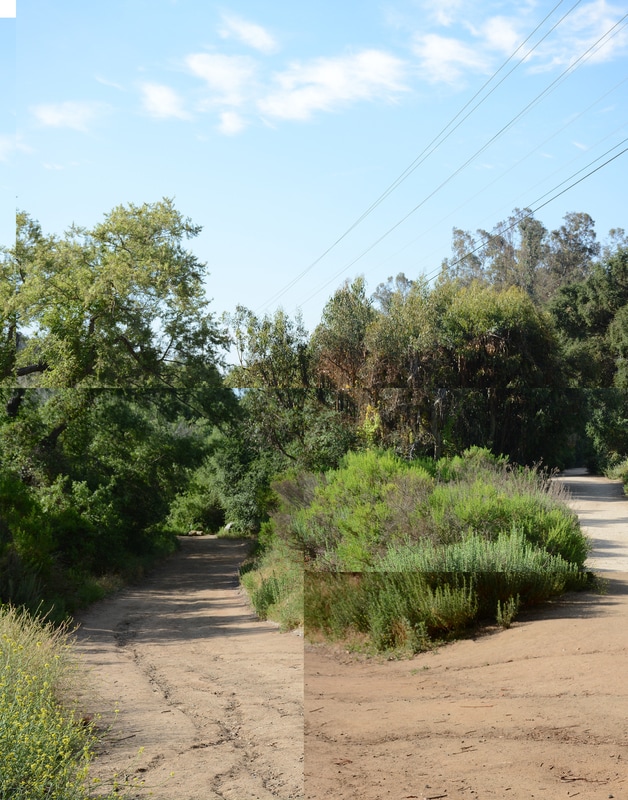
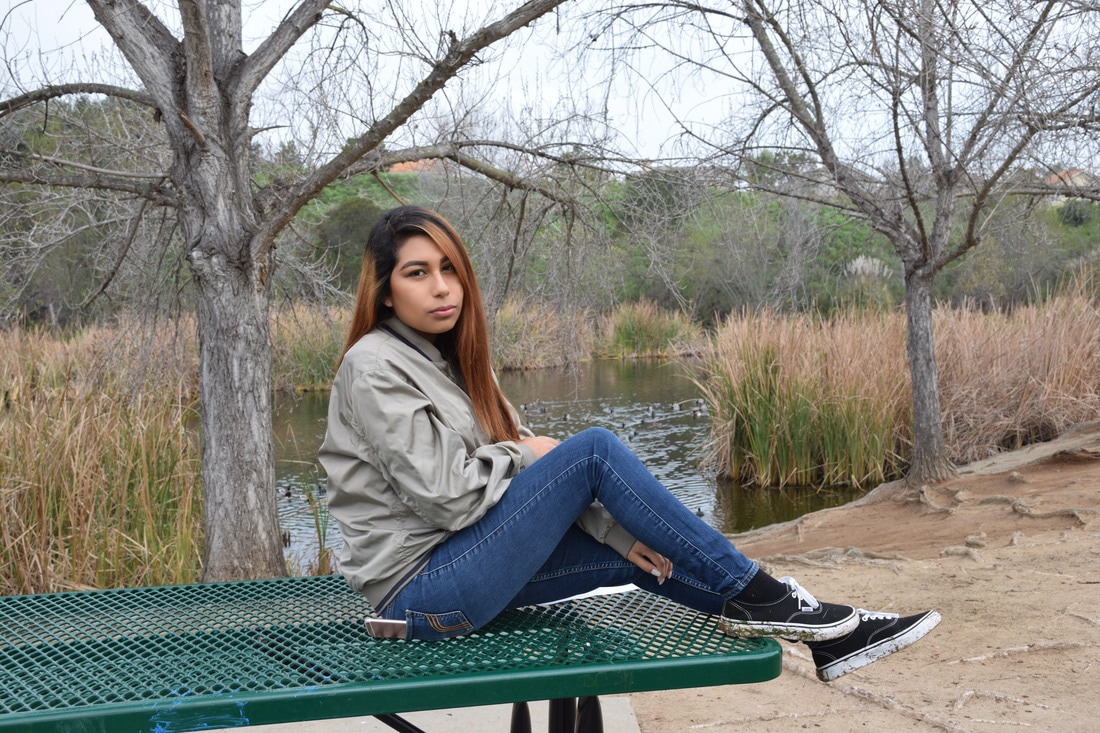
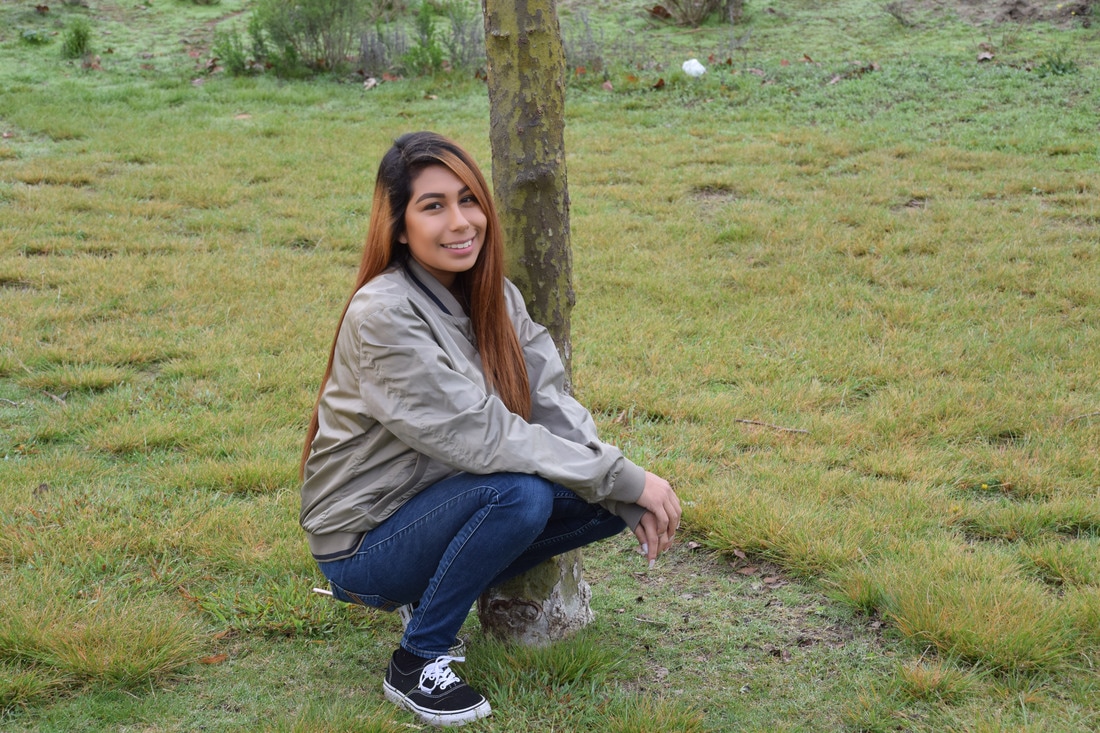
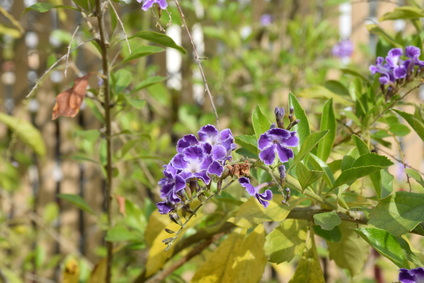
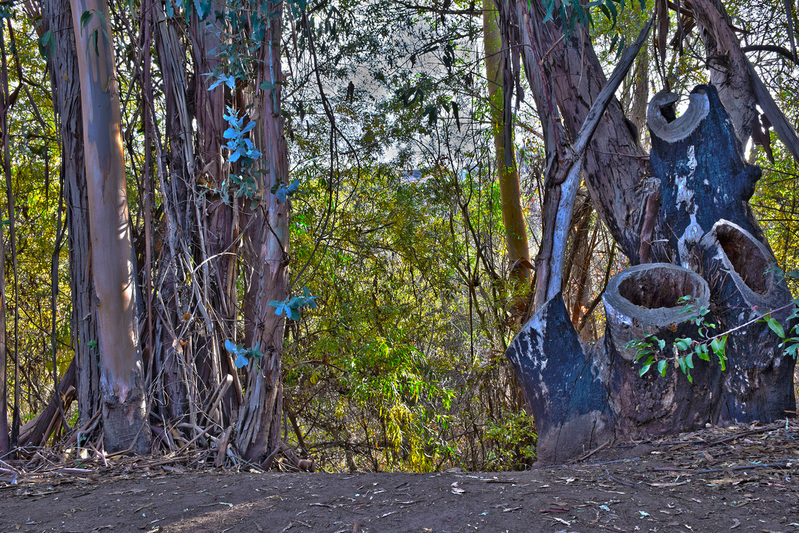
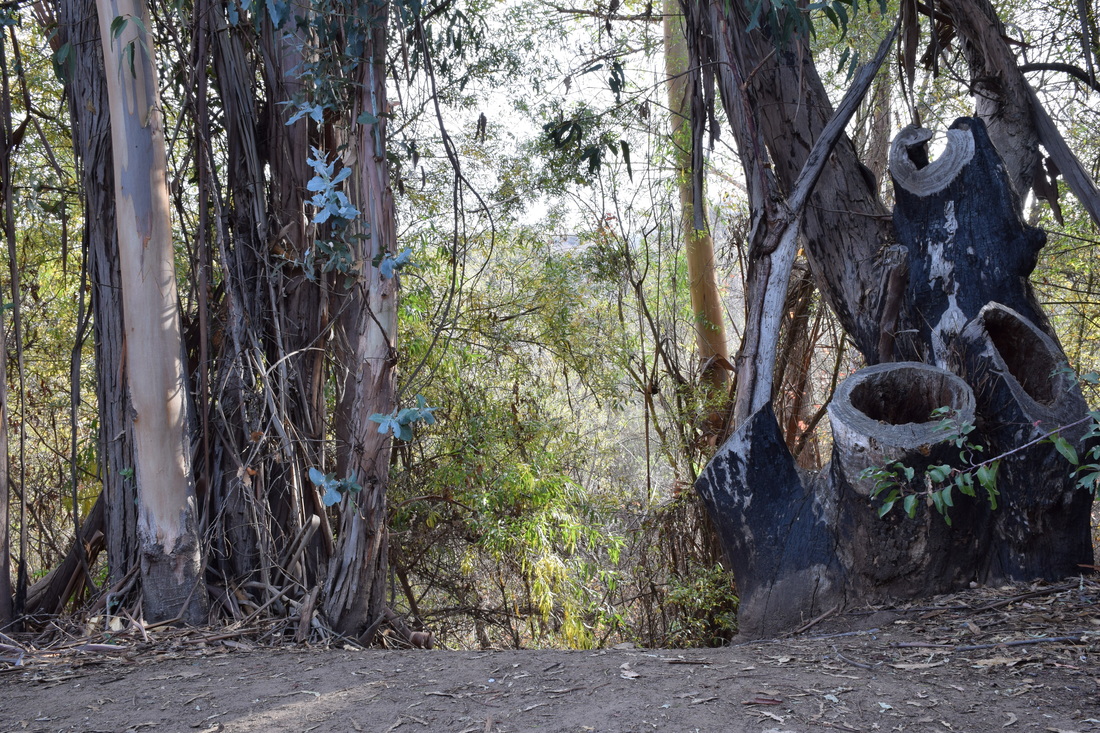
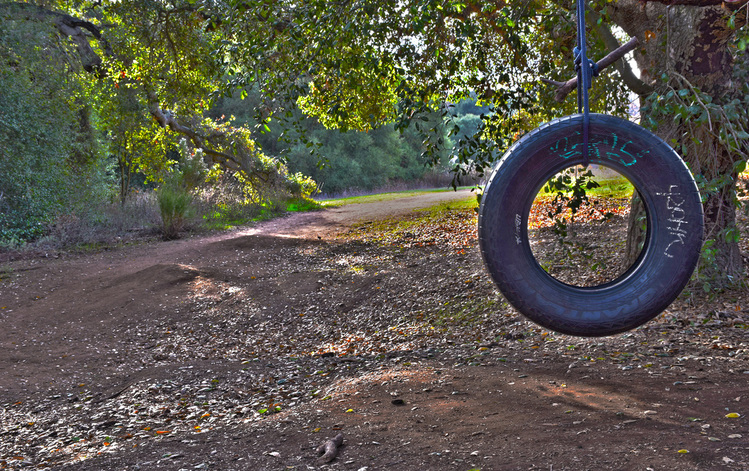
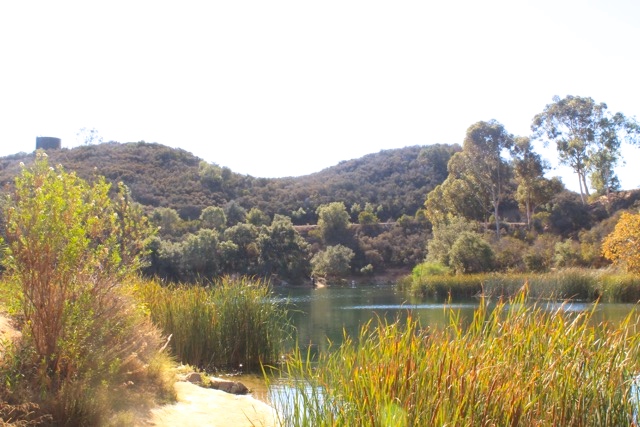
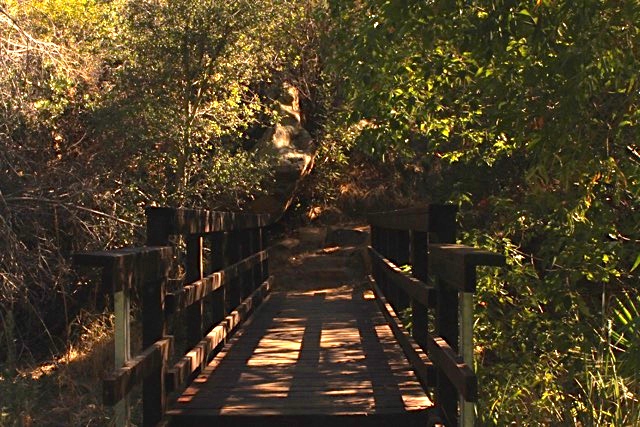
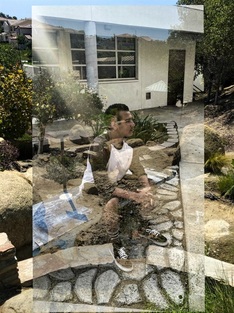
For this project we went out to the duck pond and we had to take at least a minimum of 20 photos that either went along with symmetry or leading line. After wards we take pictures of the middle, top ad bottom, left and right, of your your scene where you wan a shoot. Afterwards you open up photoshop and you use a template that is 11 x 14 in 300 resolution. Afterwards you place a photo on the template and move it around to place it so it connects with the others later on. In the process you can put one photograph over the other and you can make them brighter so it looks even better. Finally you save your photograph as last name and first name and save it into the common drive.
For this project we went out to the duck pond and we had to take at least a minimum of 20 photos that either went along with symmetry or leading line. After wards we take pictures of the middle, top ad bottom, left and right, of your your scene where you wan a shoot. Afterwards you open up photoshop and you use a template that is 11 x 14 in 300 resolution. Afterwards you place a photo on the template and move it around to place it so it connects with the others later on. In the process you can put one photograph over the other and you can make them brighter so it looks even better. Finally you save your photograph as last name and first name and save it into the common drive.
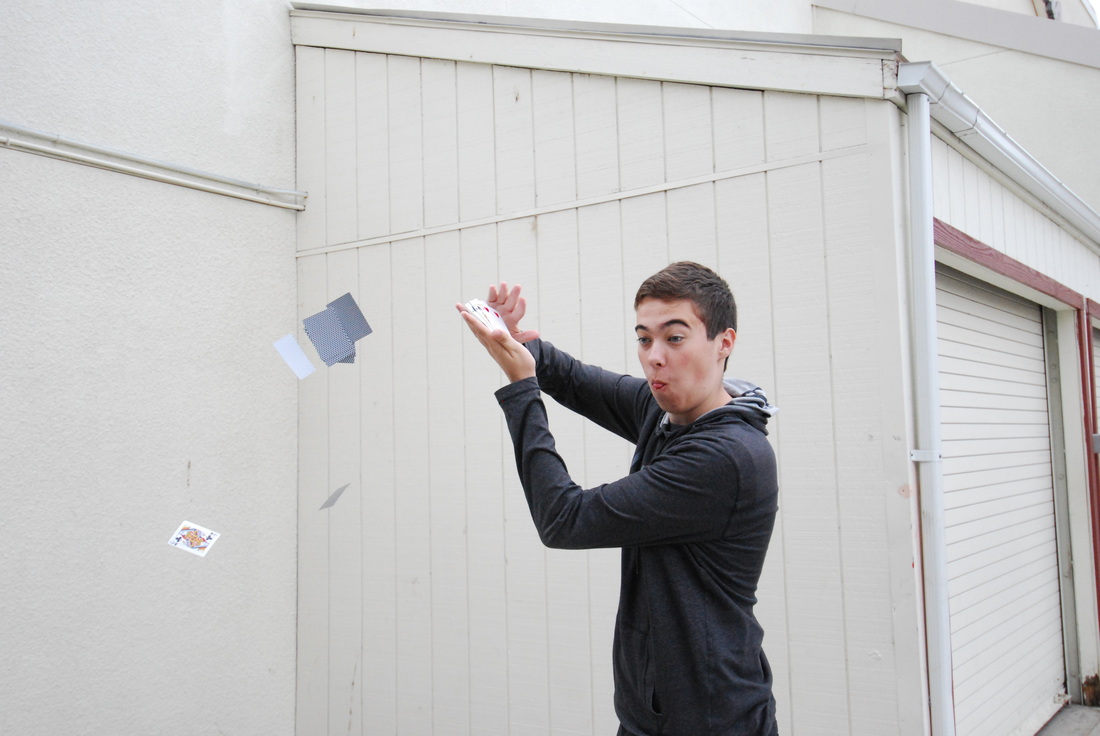
COMPLEX MAGAZINE-
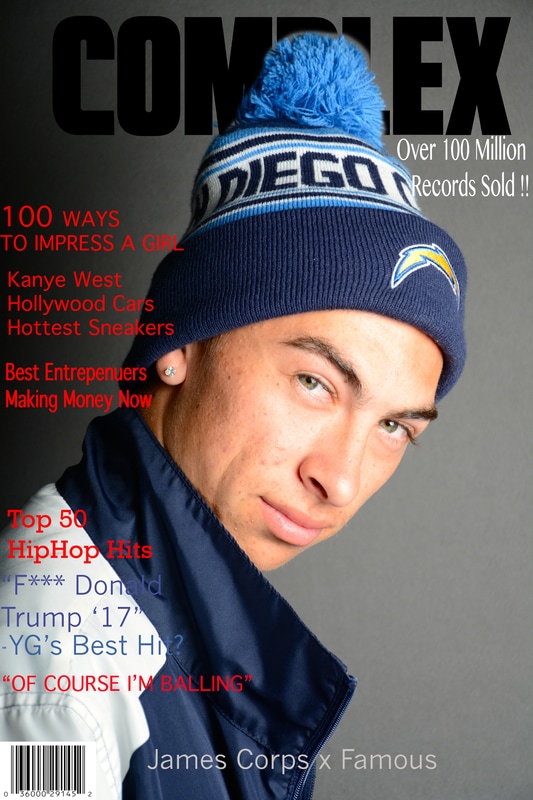
For this class magazine project, I used COMPLEX MAGAZINE. I chose "complex" magazine because it features hip hop artists, new clothes, pop culture and celebrity news, and new music out now. I like this magazine because it's more for men or teenage guys in school and it has the artists and clothes I'm into. In order to emulate the magazine I had chose , I used the same title and used the vibe they used into my cover and I also added text like they did which really looks like one of their magazines covers except its imine. The font I used was New Gothic MT and regular text with red text. I used both red and the new gothic font because I made sure it resembled the cover I was trying to emulate plus i threw in what i think would match and look best in my magazine cover which makes it pop out more. My setup was to have my model James to face right with his jacket covering his neck so it look sharper in this case. I created my photograph by just making sure it looked like the other cover i was emulating.
A strobe light is a device that is powered by AC power or by plugging it into the wall, and the purpose of it is so the photographer won't have to wait for the flash so instead he can change the mode and take a shot as soon as the light comes on. A modeling light is a continuous light source from a light bulb or LED light. The purpose is so the model looks good with the light being on her so it gives you a warmer feel. A softbox is a light modifier and the purpose is for you to change how the light is wide or thing or wear you want to have it. A gray card is a flat object card of natural gray that derives from a flat reference spectrum. A radio trigger system is a system that is controlled by the photographer so they can set the light of the mode or how bright it is.
A strobe light is a device that is powered by AC power or by plugging it into the wall, and the purpose of it is so the photographer won't have to wait for the flash so instead he can change the mode and take a shot as soon as the light comes on. A modeling light is a continuous light source from a light bulb or LED light. The purpose is so the model looks good with the light being on her so it gives you a warmer feel. A softbox is a light modifier and the purpose is for you to change how the light is wide or thing or wear you want to have it. A gray card is a flat object card of natural gray that derives from a flat reference spectrum. A radio trigger system is a system that is controlled by the photographer so they can set the light of the mode or how bright it is.
Lightroom Colored Presets-
Lightroom B&W Presets-
Number Presets-
- Anitque
- Antique Light
- Creamtone
- Cyanotype
- Selium Tone
- Sepia Tone
- Split Tone 1
- Split Tone 3
- Split Tone 3
Del Mar-

Omar Rivera
May 2, 2017
Period 2
Vision Through An Eye
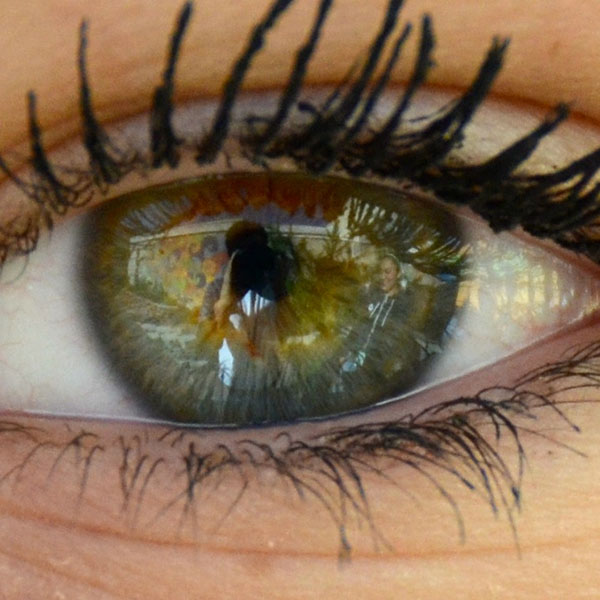
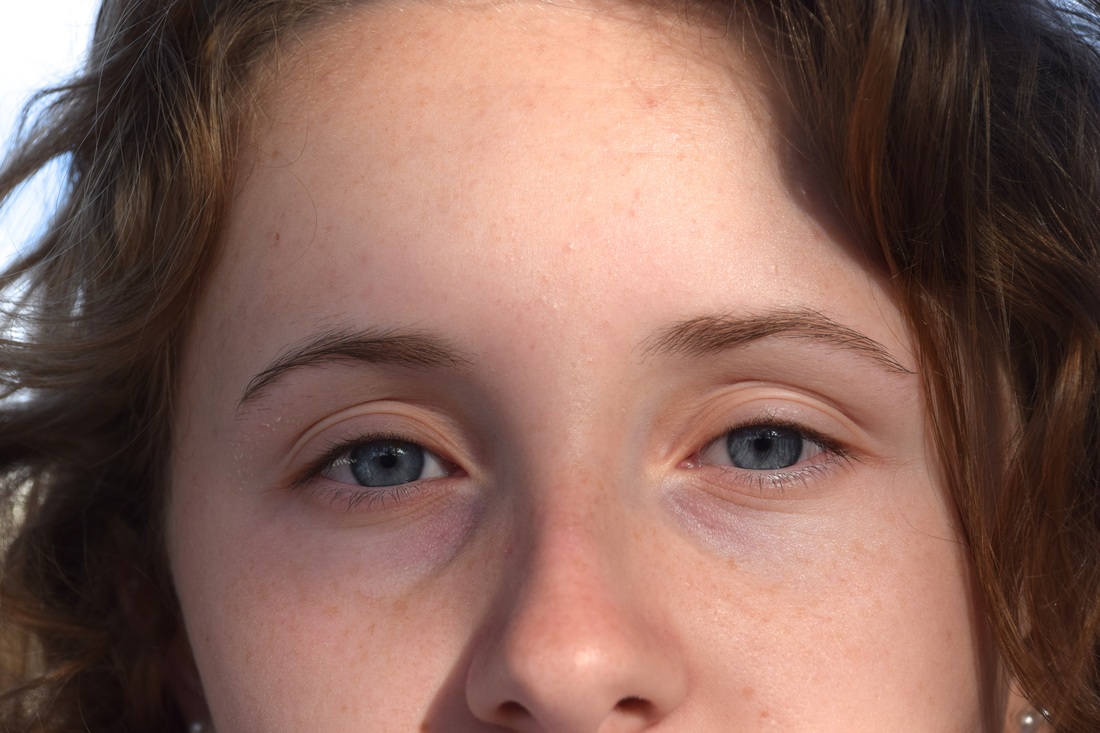
The photo I chose for this project was taken at the lunch tables in the quad in the morning during a photo-shoot. I used my friend Angels green bright-eyed to use it as for one of my projects and from there I saw it and it came out better than I had thought. The compositional rule of my picture would be symmetry because her long eyelashes all look the same and play along in this picture. The camera I used in this photo was the Nikon D5300/ 18-140mm lens.
I created this image by used my friends eye and made her look towards the sun so her eye can look bright. If you look closely you can my partner and I in her pupil. Adder that I cropped out the excess stuff of the photo out and brightened up using Photoshop. My image is in the ‘Portrait Photography” division because is it a portrait of my friends eyes and it came out well.
May 2, 2017
Period 2
Vision Through An Eye
The photo I chose for this project was taken at the lunch tables in the quad in the morning during a photo-shoot. I used my friend Angels green bright-eyed to use it as for one of my projects and from there I saw it and it came out better than I had thought. The compositional rule of my picture would be symmetry because her long eyelashes all look the same and play along in this picture. The camera I used in this photo was the Nikon D5300/ 18-140mm lens.
I created this image by used my friends eye and made her look towards the sun so her eye can look bright. If you look closely you can my partner and I in her pupil. Adder that I cropped out the excess stuff of the photo out and brightened up using Photoshop. My image is in the ‘Portrait Photography” division because is it a portrait of my friends eyes and it came out well.
Family-
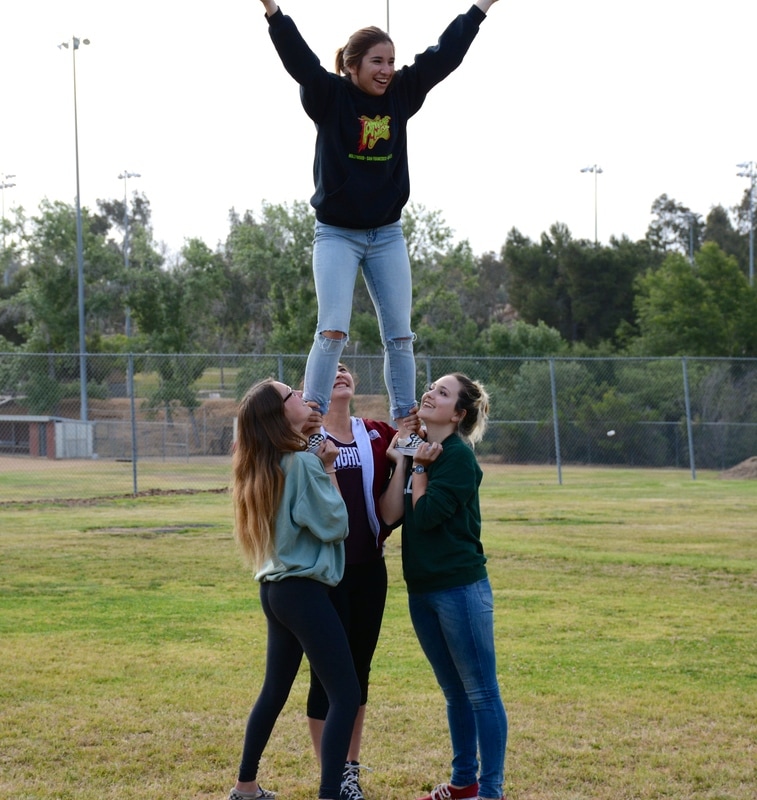
Sports Photography-
ISO 400, Aperture f/8, Shutter Speed 1/800
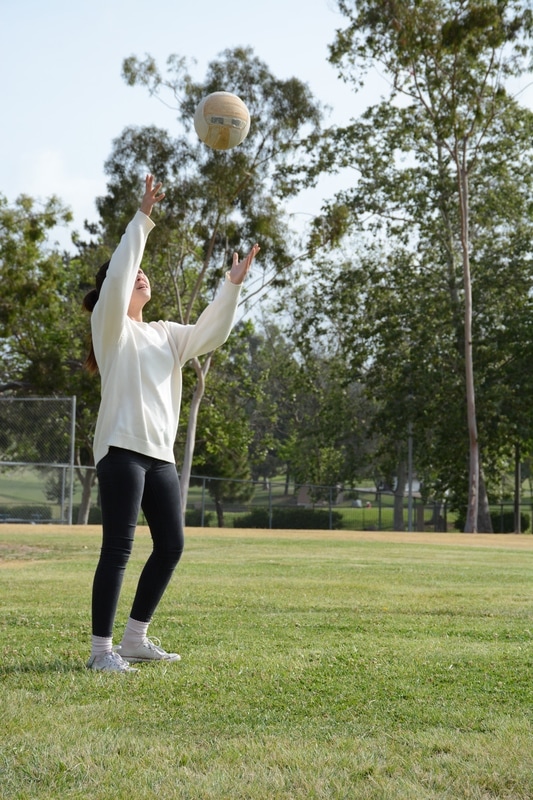
ISO 400, Aperture f/7.1, Shutter Speed 1/800
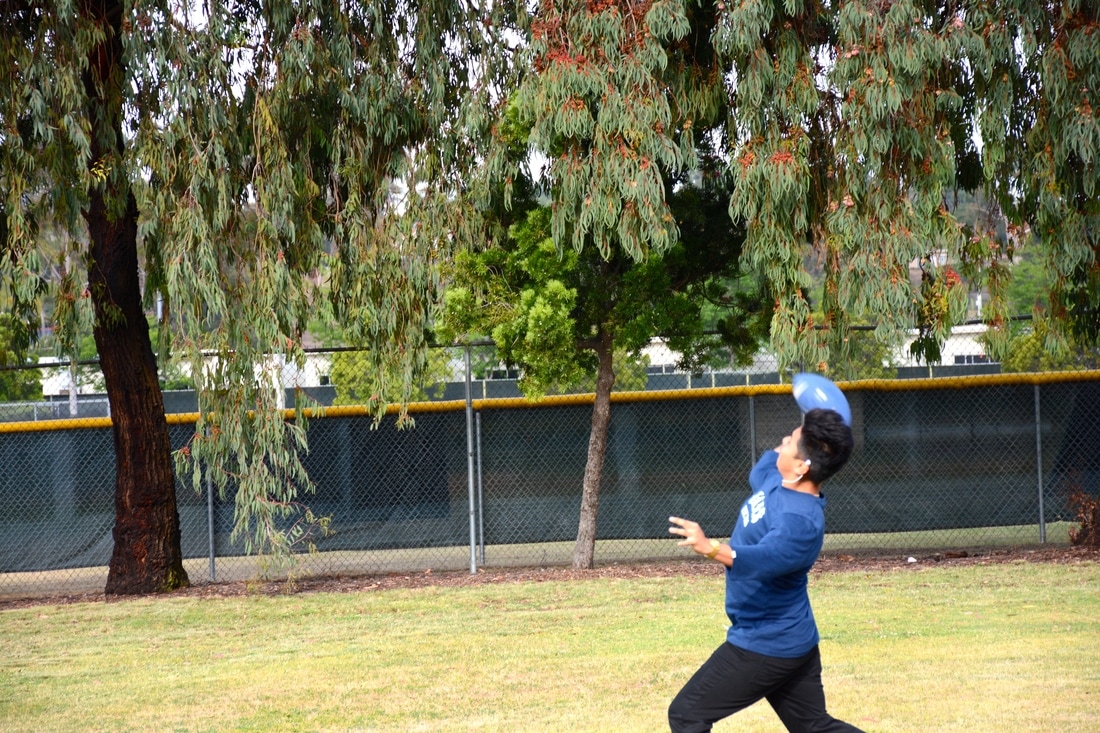
ISO 400, Aperture f/5.3, Shutter Speed 1/800
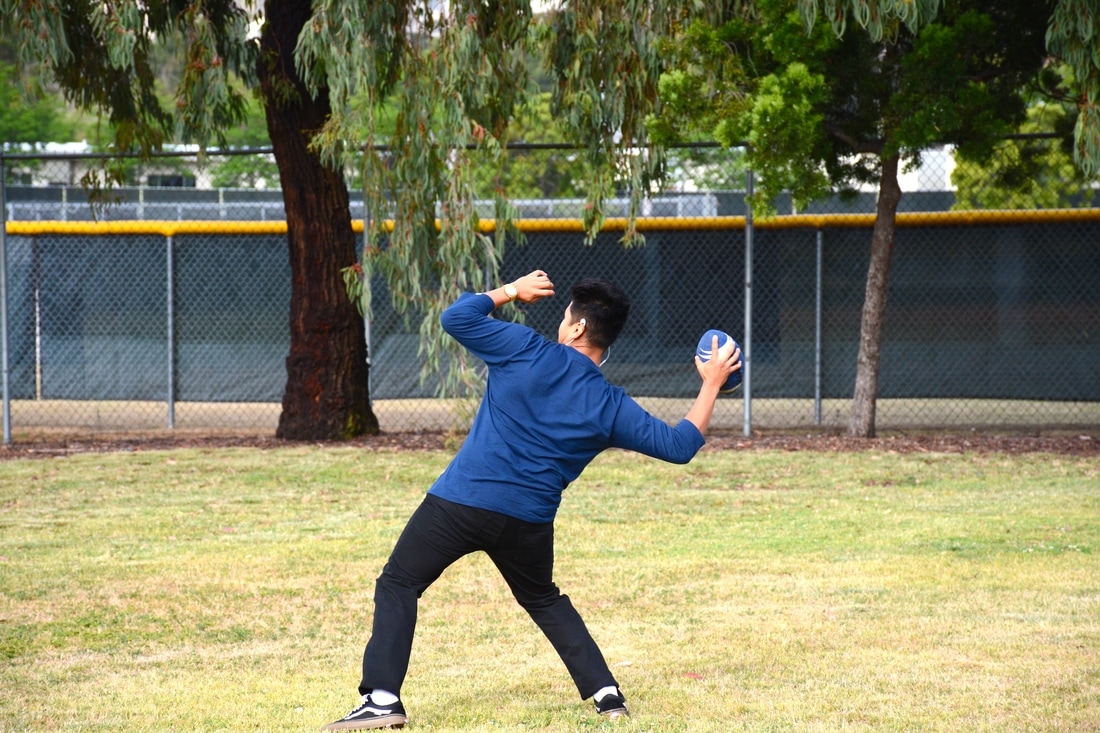
ISO 400, Aperture f/7.1, Shutter Speed 1/800
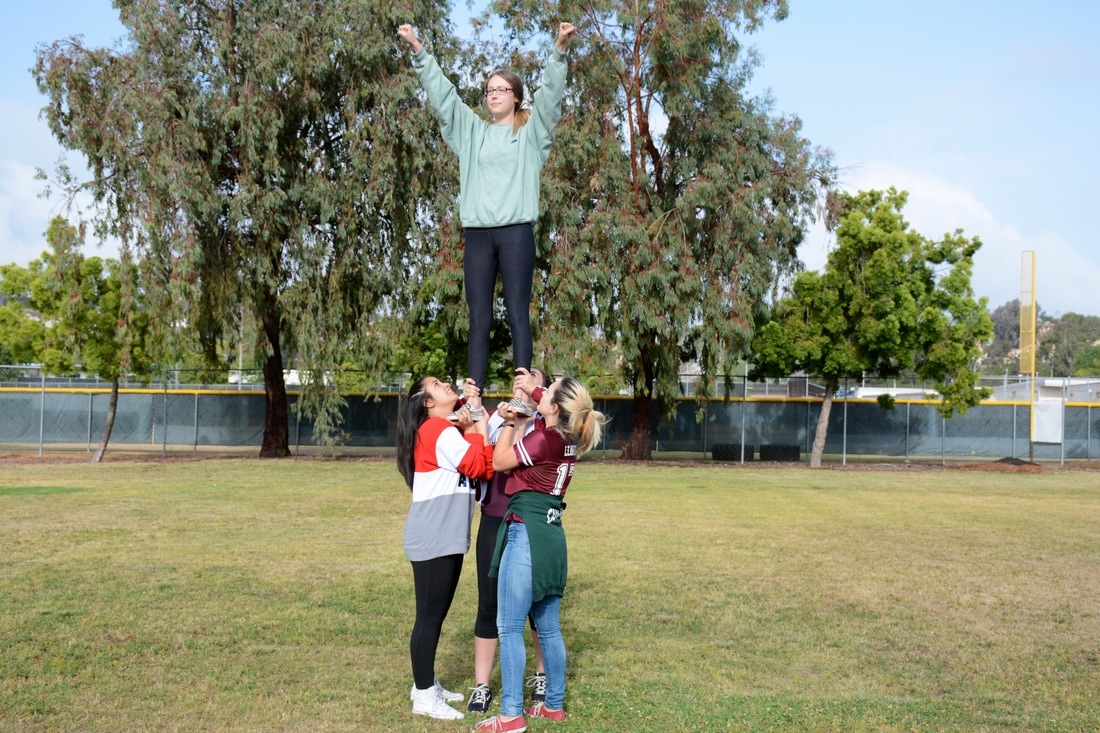
ISO 400, Aperture f/8, Shutter Speed 1/800
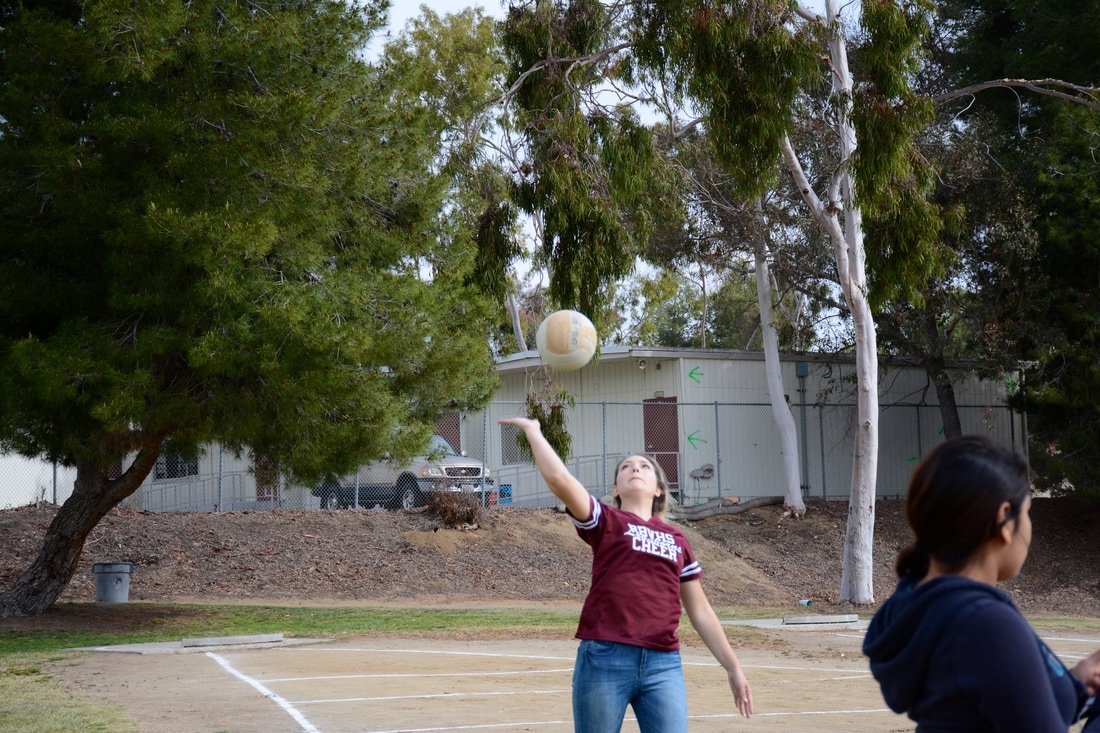
ISO 400, Aperture f/5.6, Shutter Speed 1/1250
ISO 400, Aperture f/7.1, Shutter Speed 1/800
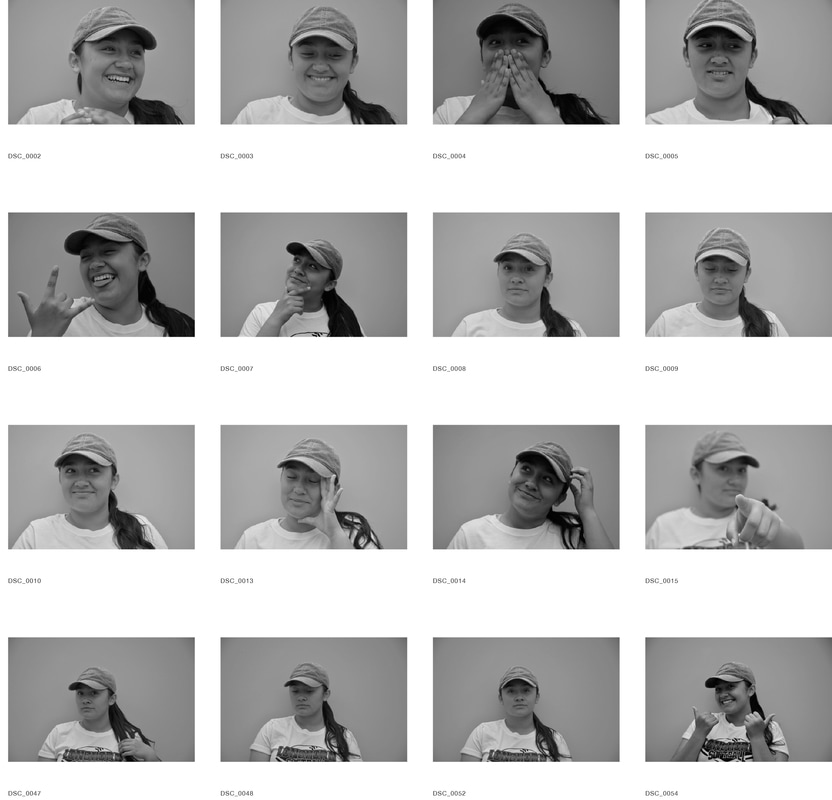
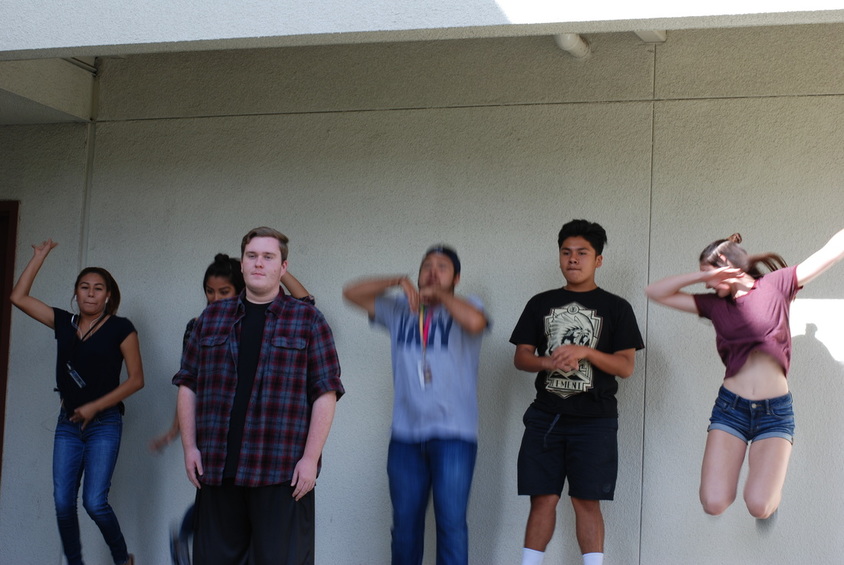
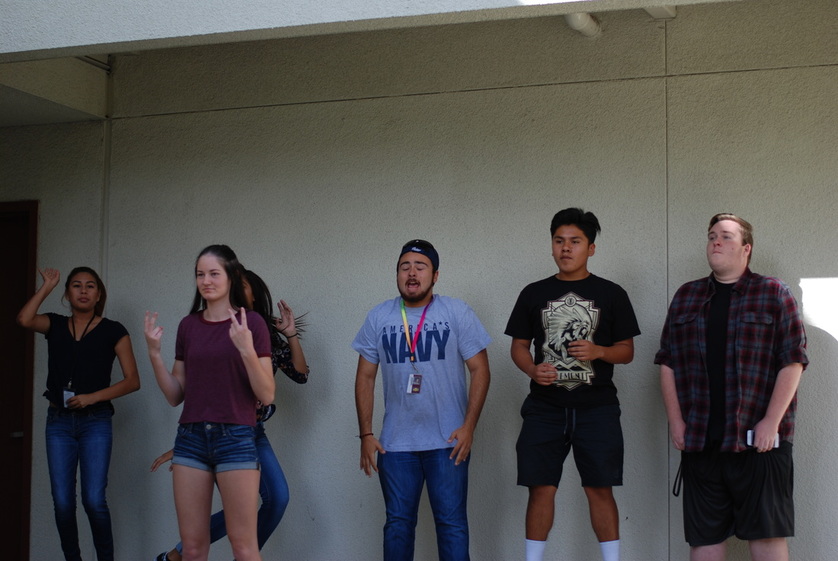
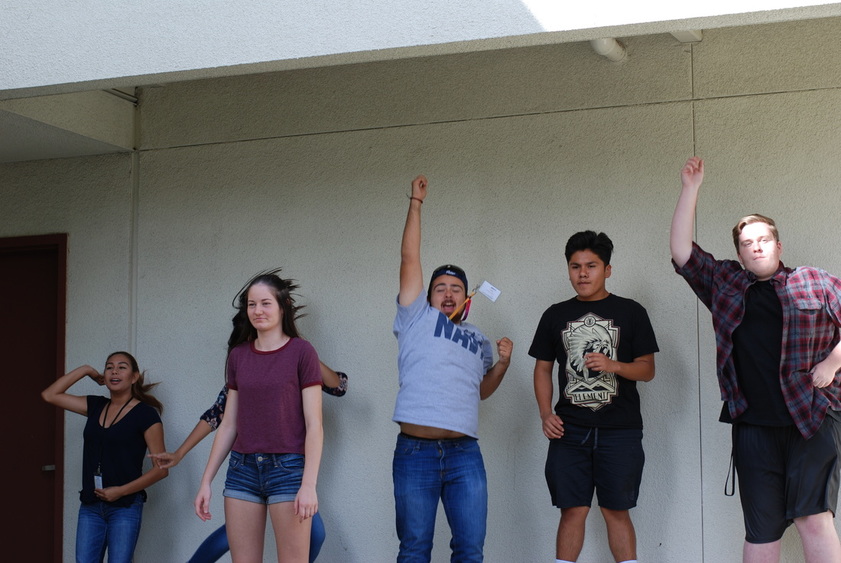
16 Expressions
Del Mar-
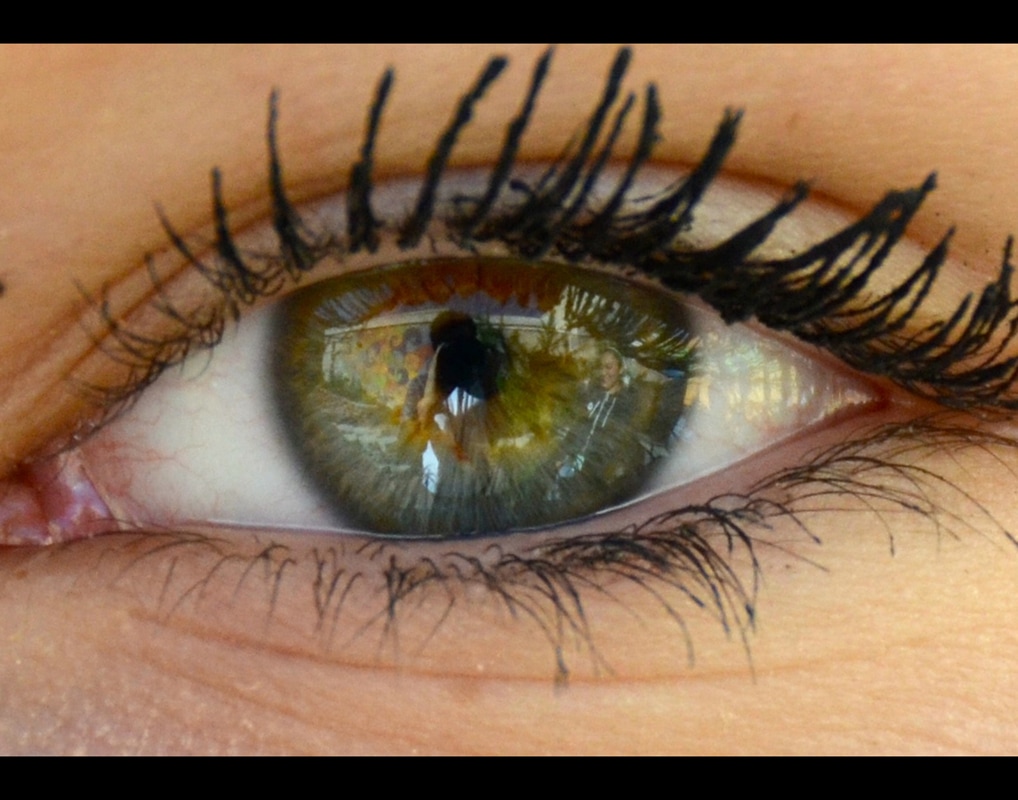
Vision Through An Eye
The photo I chose for this project was taken at the lunch tables in the quad in the morning during a photo-shoot. I used my friend Angels green bright-eyed to use it as for one of my projects and from there I saw it and it came out better than I had thought. The compositional rule of my picture would be symmetry because her long eyelashes all look the same and play along in this picture. The camera I used in this photo was the Nikon D5300/ 18-140mm lens.
I created this image by used my friends eye and made her look towards the sun so her eye can look bright. If you look closely you can my partner and I in her pupil. Adder that I cropped out the excess stuff of the photo out and brightened up using Photoshop. My image is in the ‘Portrait Photography” division because is it a portrait of my friends eyes and it came out well.
Composite Photograph-
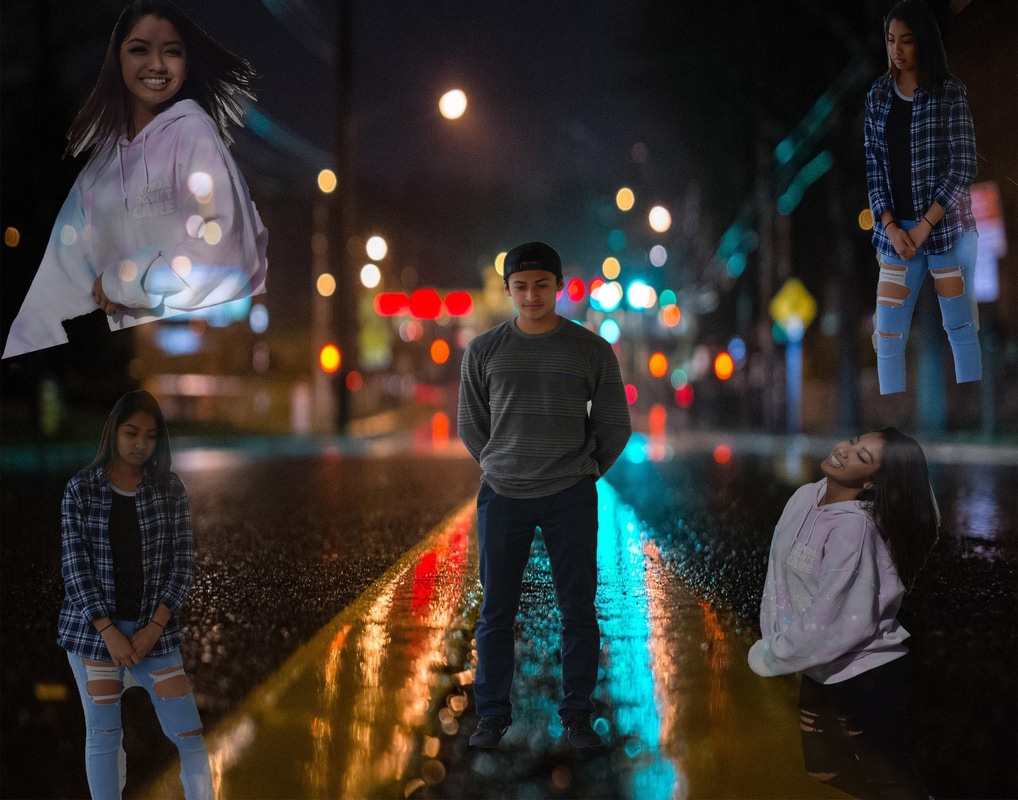
In my composite graph I used photo shop and used my partners for this. I first grabbed a background picture for my wall in the back which is a street that was raining before night. I used this background because the street is lonely which is how the main theme of this project was for mine. Then i took severe pictures of my partner Lorena and iI photo shopped her in to the background. I used layer masking for this project the most. The song i chose was " Some Kind of Drug" by G easy. Its about a couple that have broken up and the guy now misses her. She is resembled as a drug because she is like a drug to him and he needs that drug. The lyrics say, " I'm on some kind of drug, i can't explain all the ways you get me high." The song matches the image above because the boyfriend is in the middle center and around him is his ex who he thinks about 24/7. I used the crop tool to crop the other part of the model and used the brush to fade the model away so it looks like she's moving away.
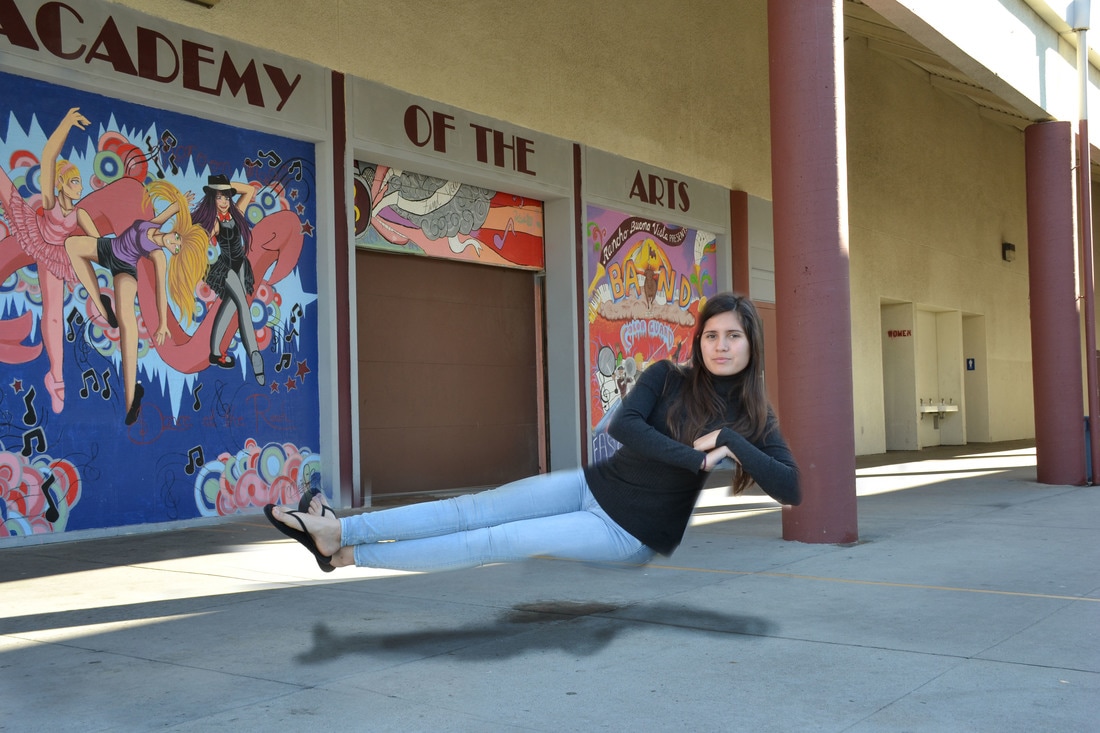
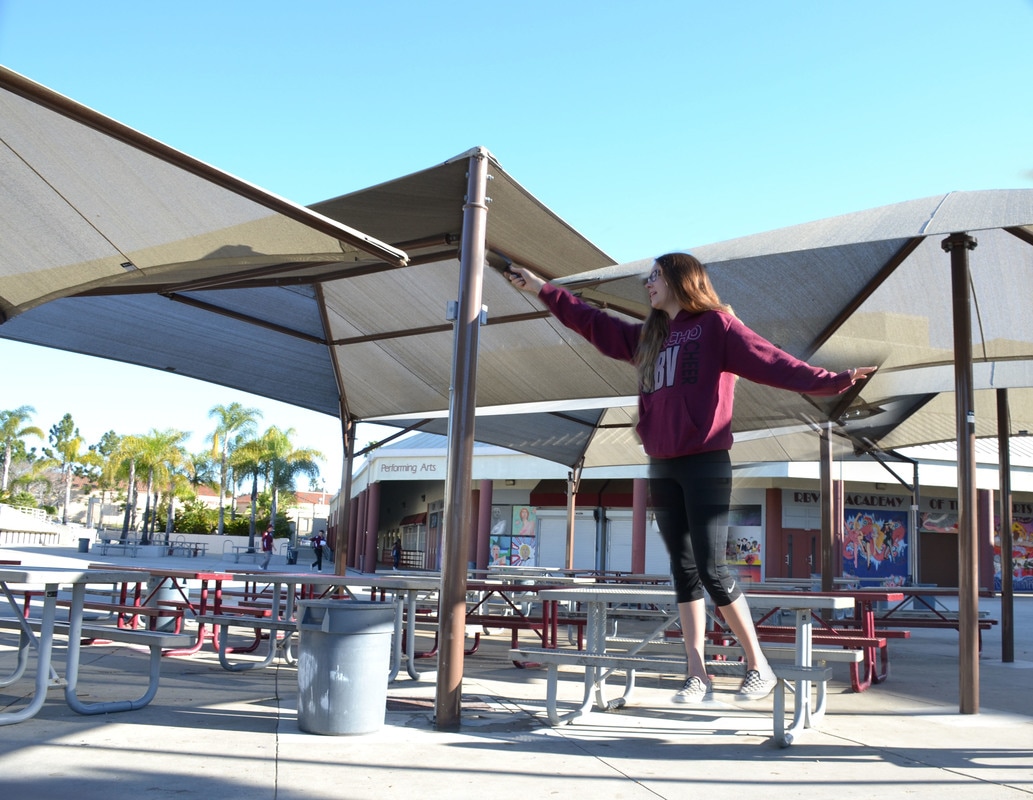
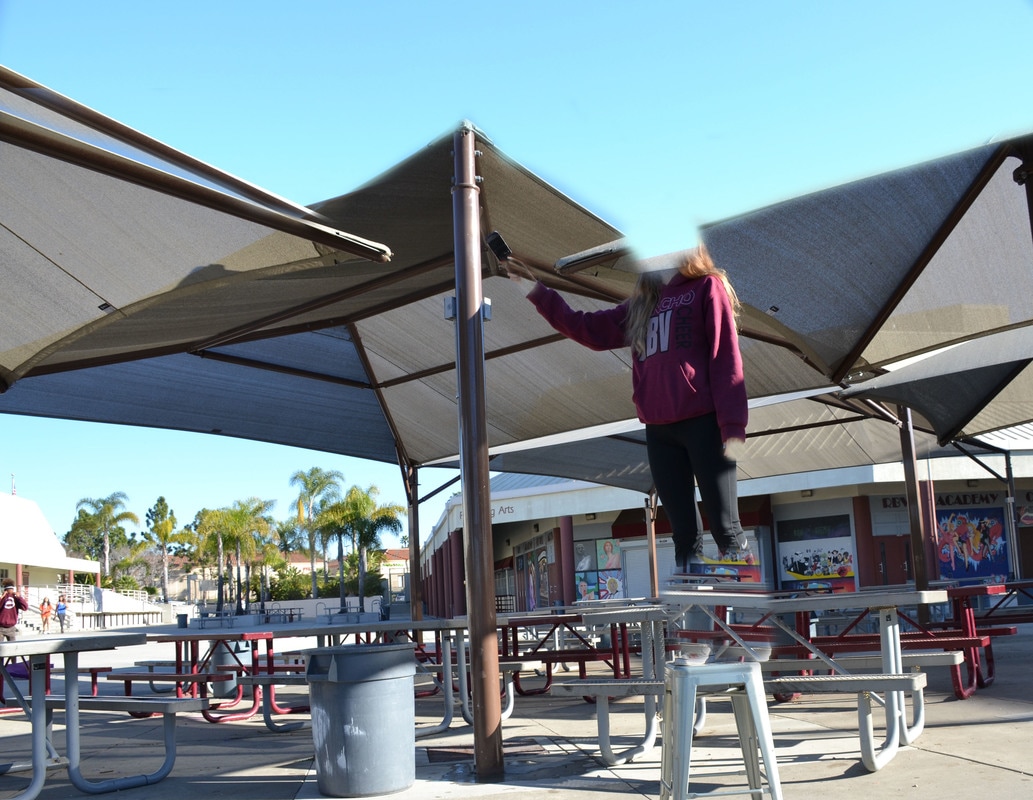
Flying and Invisible

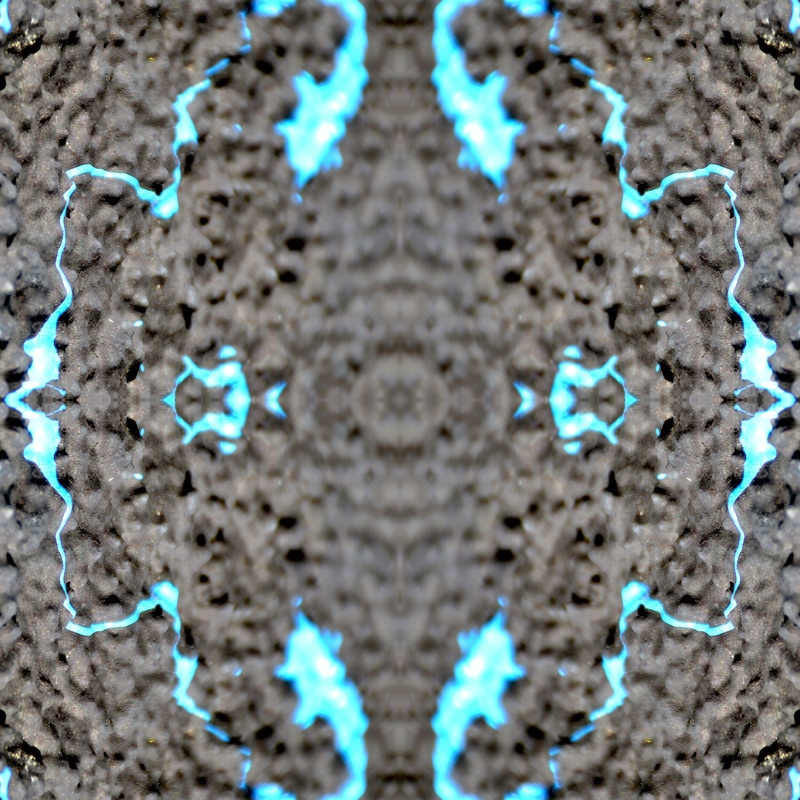
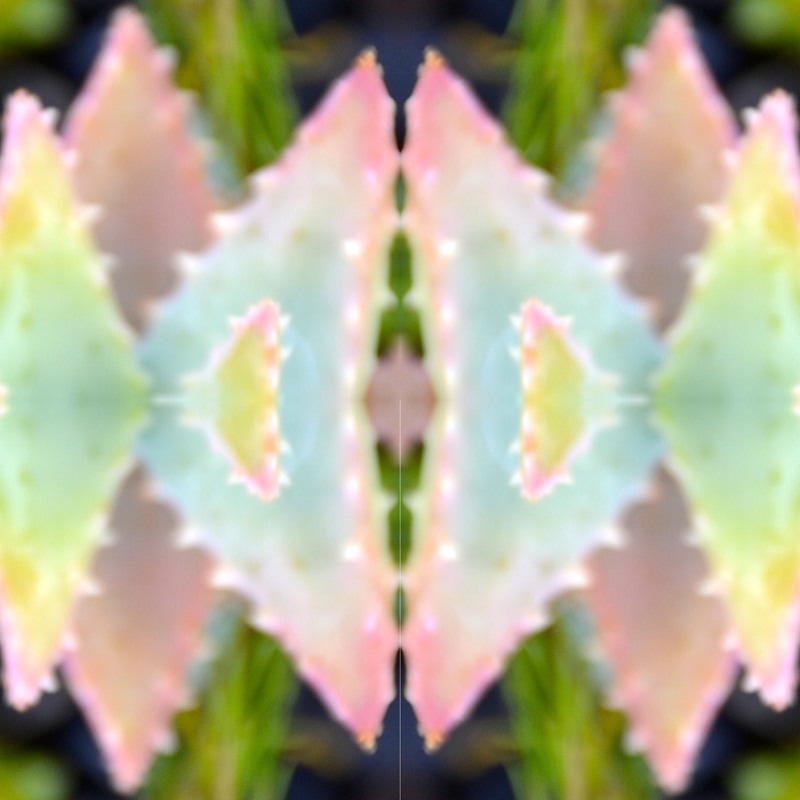
Mandala
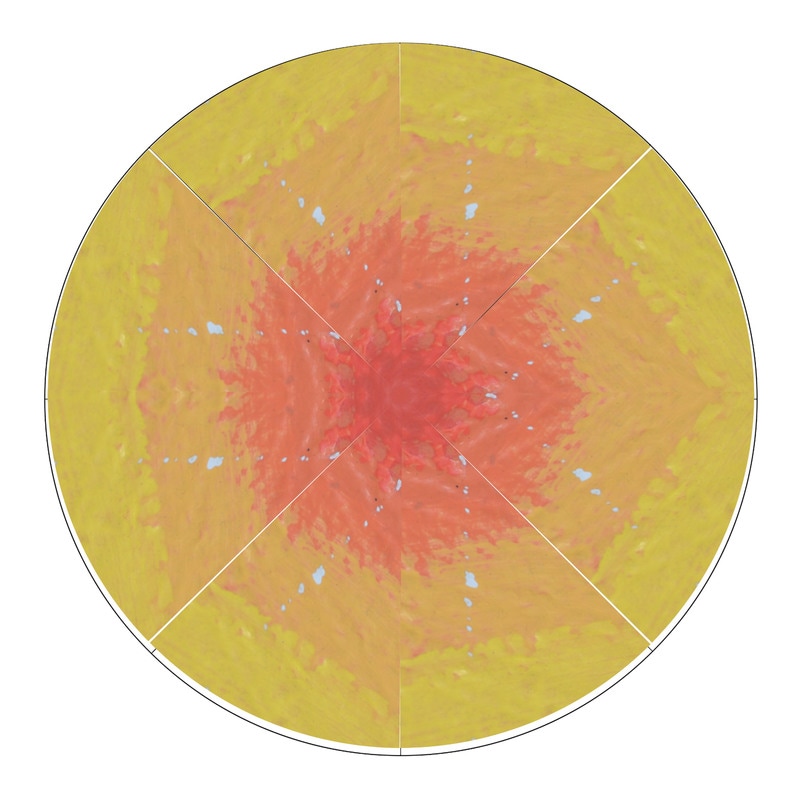
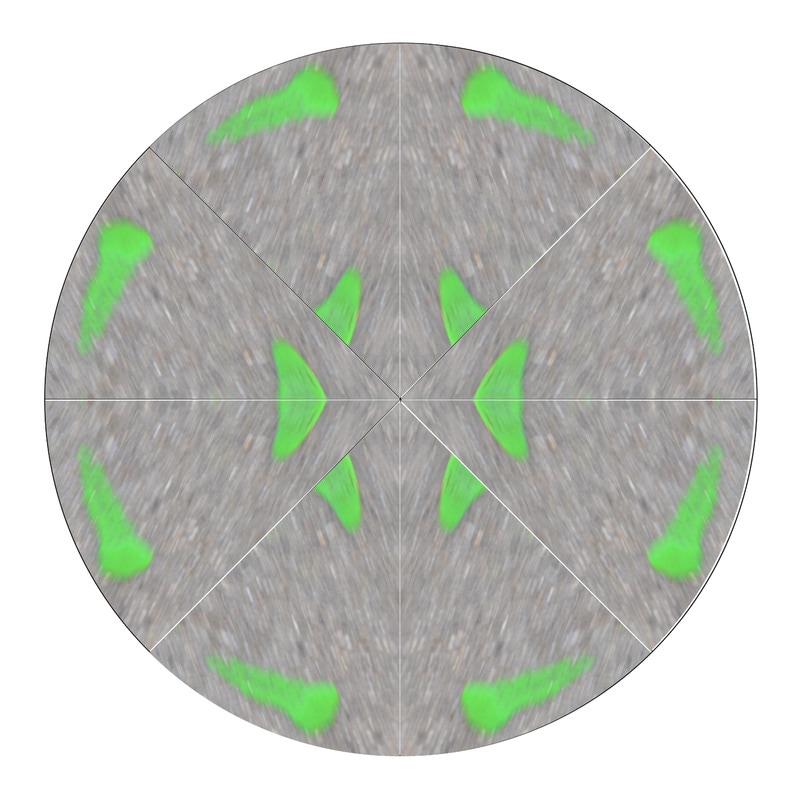
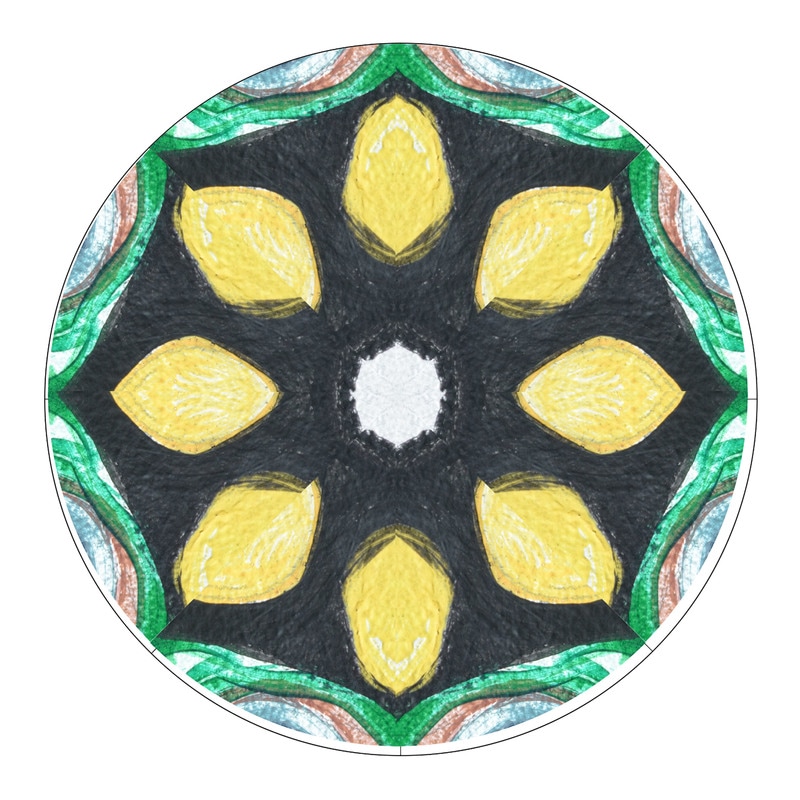
A mandala is a circular image containing six slices of the same cropped out picture into one image. It is also pretty much copied in a horizontal way when split in half way. How do you create a mandala? You first grab the template from the drive , second you use the magic wand from the tools section and drag the triangle over to the image selected and press command and c at the first time so it copies onto to your template, when on your template make a duplicate layer
Tessallations
|
|
|
|
|
|
|
|
|
|
How To-
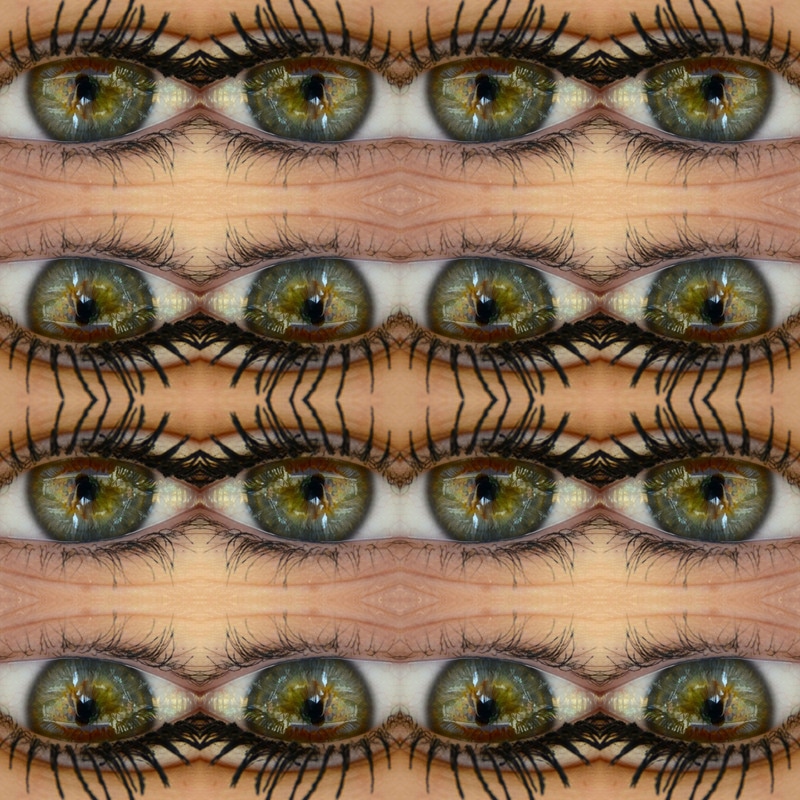
Tessellation- is pretty much a square shot from an image and you fit into one square and rotate it 90' degrees till you make them look the same. In order to create a tessellation you first open up Photoshop and place your image you will crop and the template will be used by adding new guides which basically just guide you on citing in the squares. Once you have cropped out your square shot you must re-size the image in order to fit in it. Then you fit all the pictures together and save is last name first name into the common drive folder. What i liked about this project was that it is anew thing for me to experience and have fun with but over all it is something new haven't done with photography. The tessellation image that I created was the one with my friend's green eyes because you can see the color of her eyes clearly and they look awesome when collided The one thing I had struggled the most on was the making of the inch by inch template and arranging the photos to make the appear as well. If i were to do these tessellations again I think I would try removing the white lens so they wouldn't appear and take new photos to make them look even neater yet better.
Tessellation- is pretty much a square shot from an image and you fit into one square and rotate it 90' degrees till you make them look the same. In order to create a tessellation you first open up Photoshop and place your image you will crop and the template will be used by adding new guides which basically just guide you on citing in the squares. Once you have cropped out your square shot you must re-size the image in order to fit in it. Then you fit all the pictures together and save is last name first name into the common drive folder. What i liked about this project was that it is anew thing for me to experience and have fun with but over all it is something new haven't done with photography. The tessellation image that I created was the one with my friend's green eyes because you can see the color of her eyes clearly and they look awesome when collided The one thing I had struggled the most on was the making of the inch by inch template and arranging the photos to make the appear as well. If i were to do these tessellations again I think I would try removing the white lens so they wouldn't appear and take new photos to make them look even neater yet better.
Portraits
Aperture f/8, ISO 400, Shutter Speed 1/180
Aperture f/8, ISO 400, Shutter Speed 1/180
Aperture f/8, ISO 400, Shutter Speed 1/250
Aperture f/8, ISO 400, Shutter Speed 1/180
Aperture f/8, ISO 400, Shutter Speed 1/250
 Aperture f/8, ISO 400, Shutter Speed 1/350
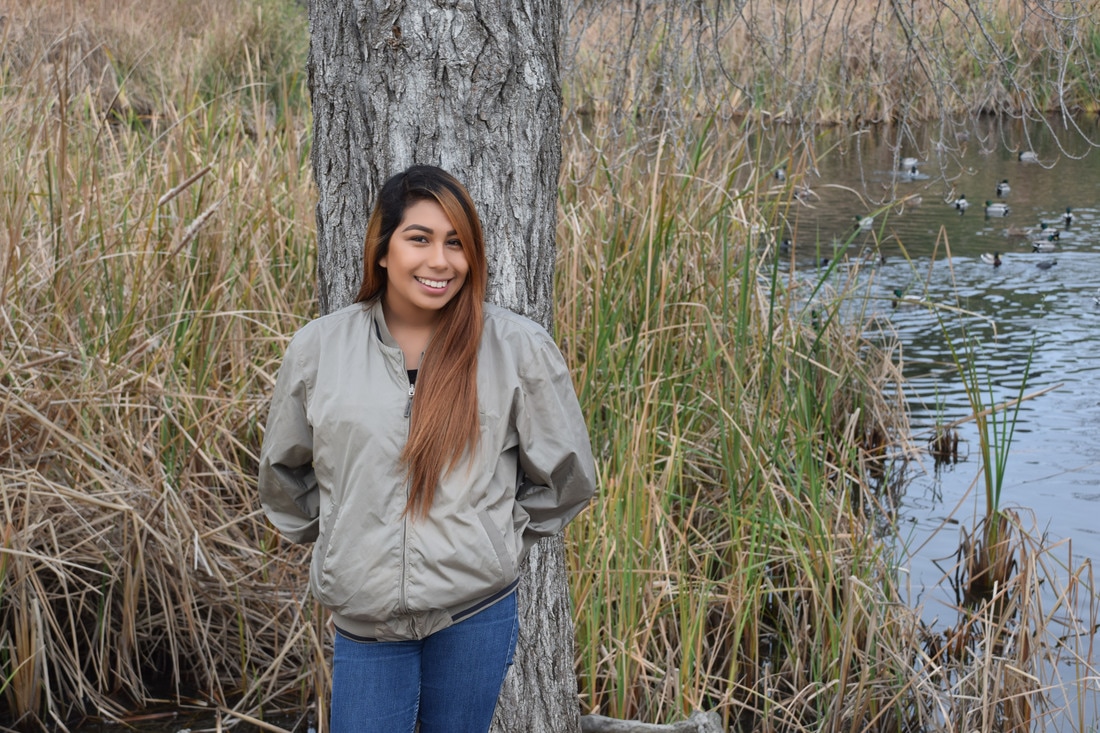
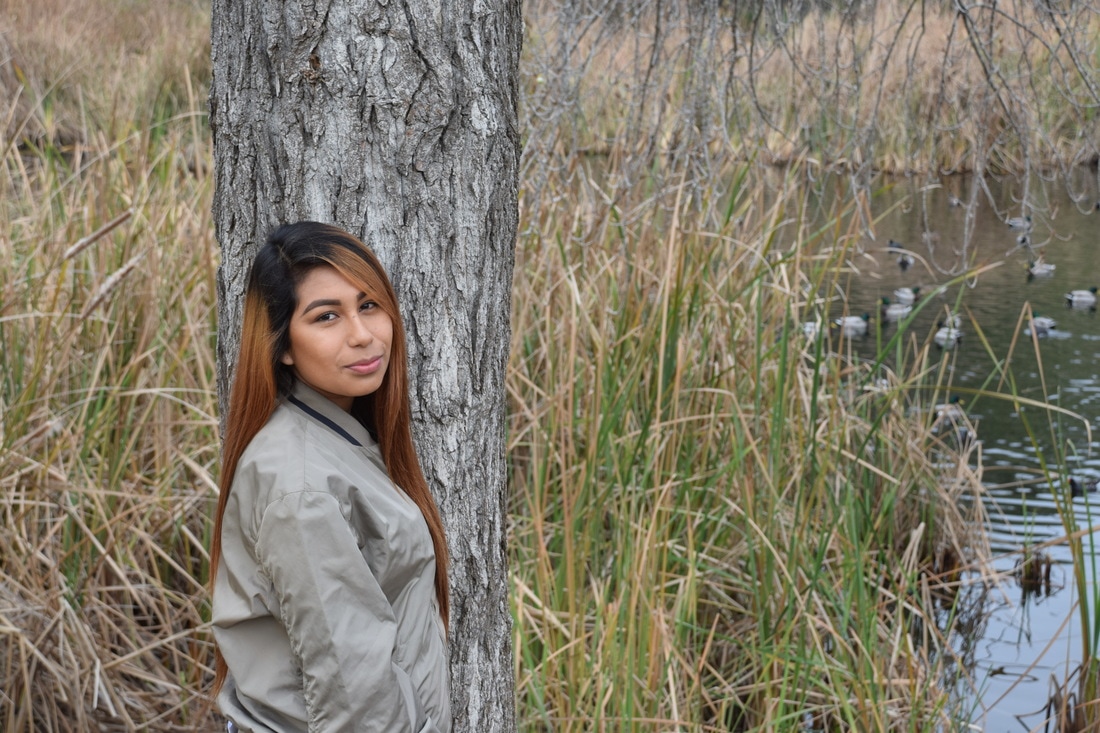
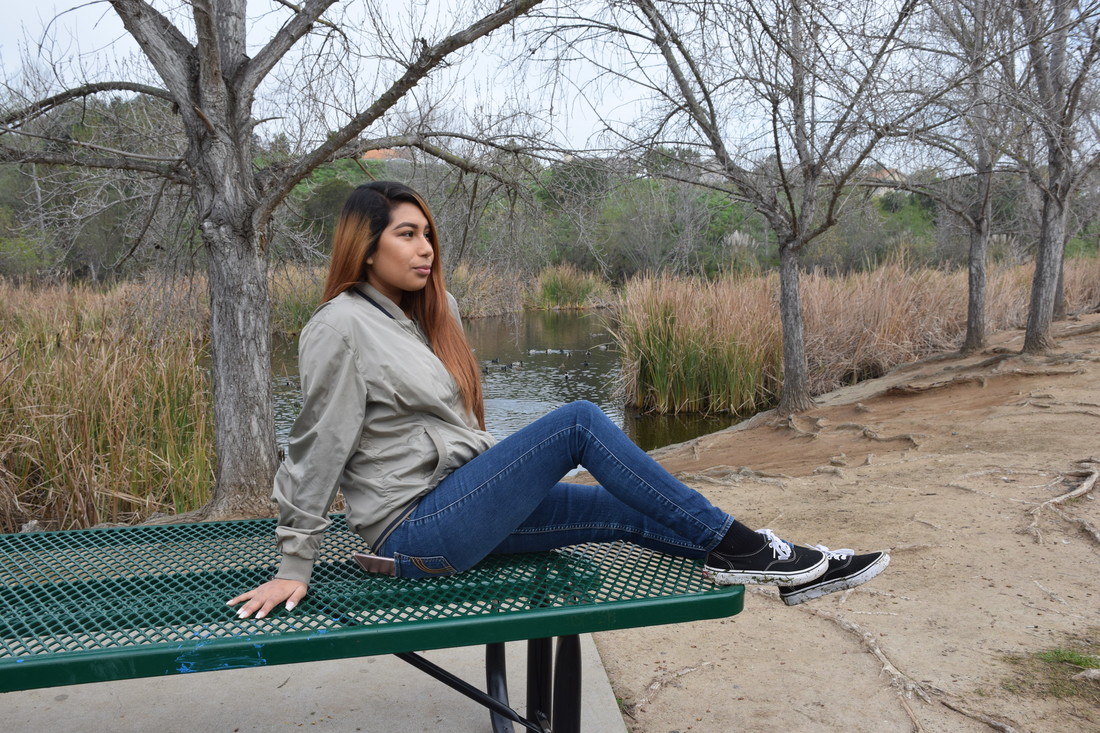
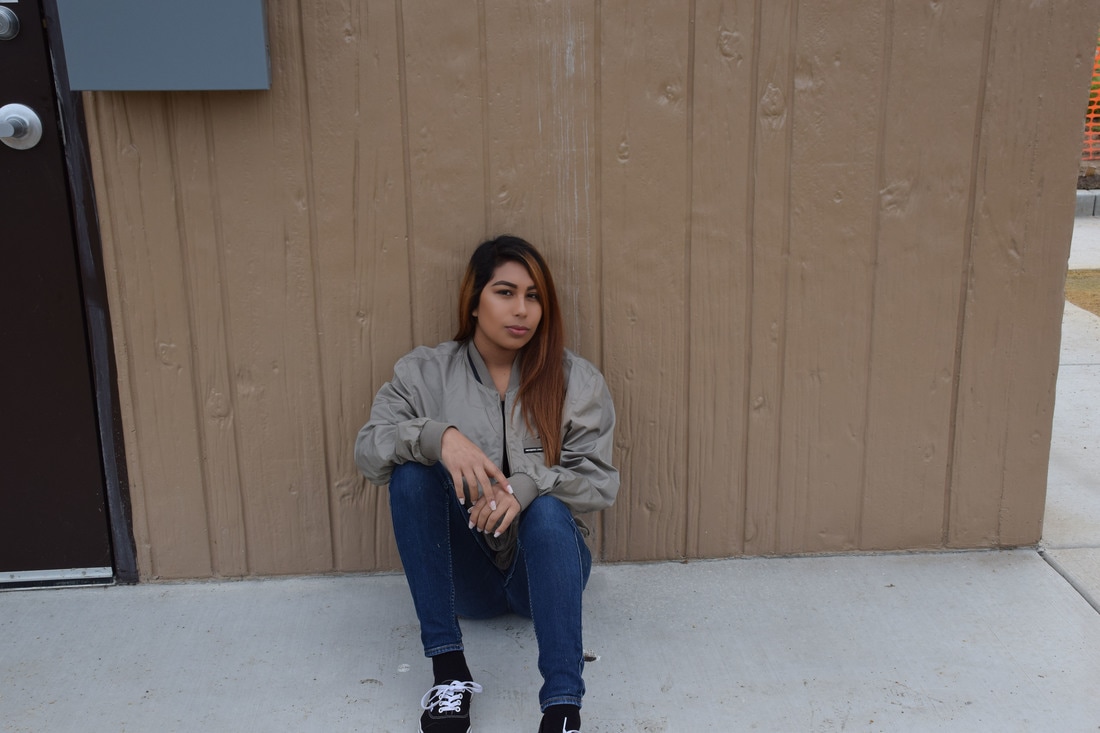
From going to the duckpond, I learned that when taking a portrait there are natural objects you can use in the outside. We used different poses and we sat on a bench, leaned on a tree, and lays on the floor. For this photo project we didn't use a reflector because the sun wasn't out it was cloudy instead. After you have token your pictures you retouch them by opening up photoshop and open up the tutorial video. In the process you can fix their scars, pimples, and other cool effects. Some positions that use portraits are make up editors, photographers, models, and professional photographers. They make about 65,000 a year so thats their salary and they charge about $350-500 for a photoshoot.
Project
Food Photography
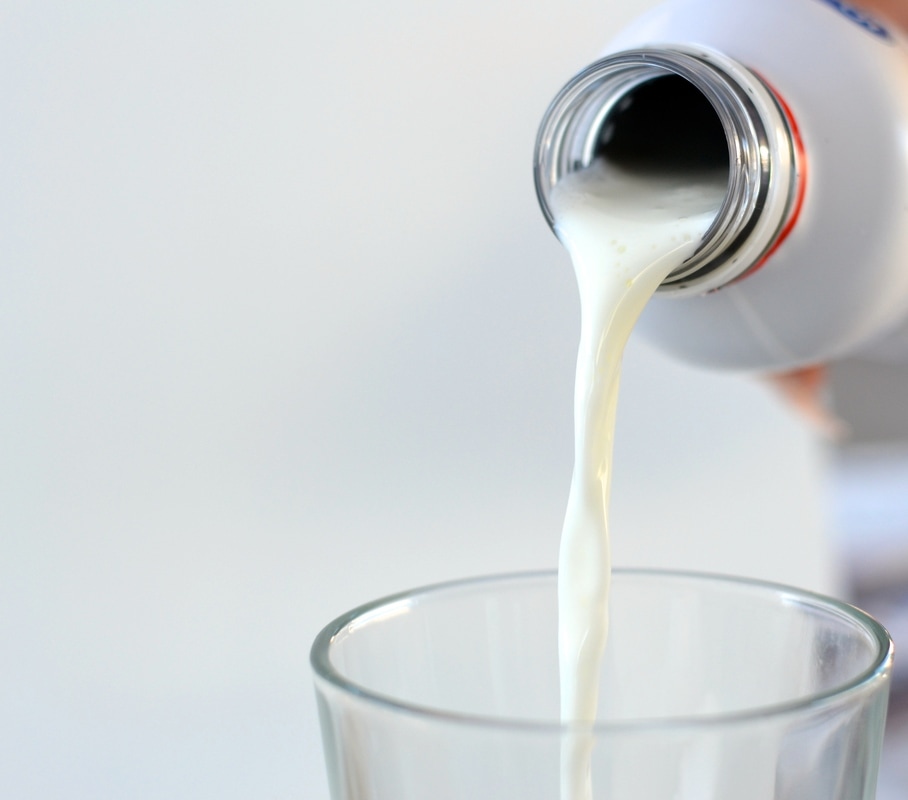
"Love Me Some Milk" ISO 400, Aperture f/1.8, Shutter Speed 1/500
"Fill Me Up Dawwwwg" ISO 400, Aperture f/8, Shutter Speed 1/125
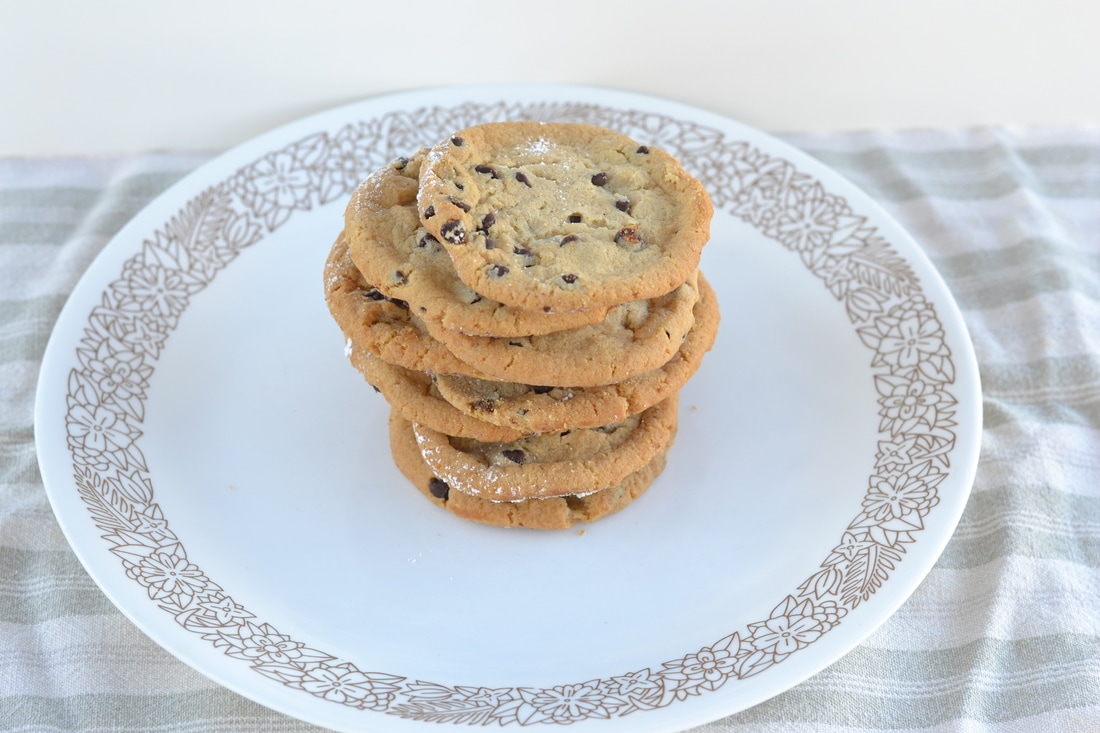
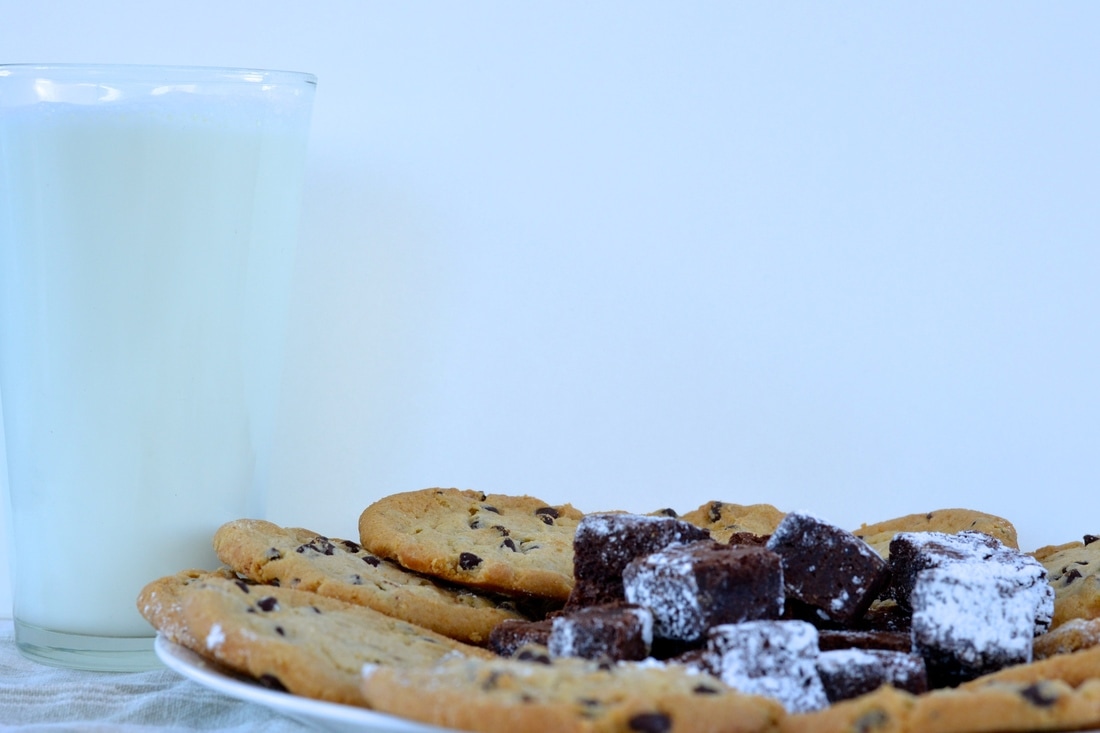
"Keep It Stacking" ISO 400, Aperture f/8, Shutter Speed 1/100

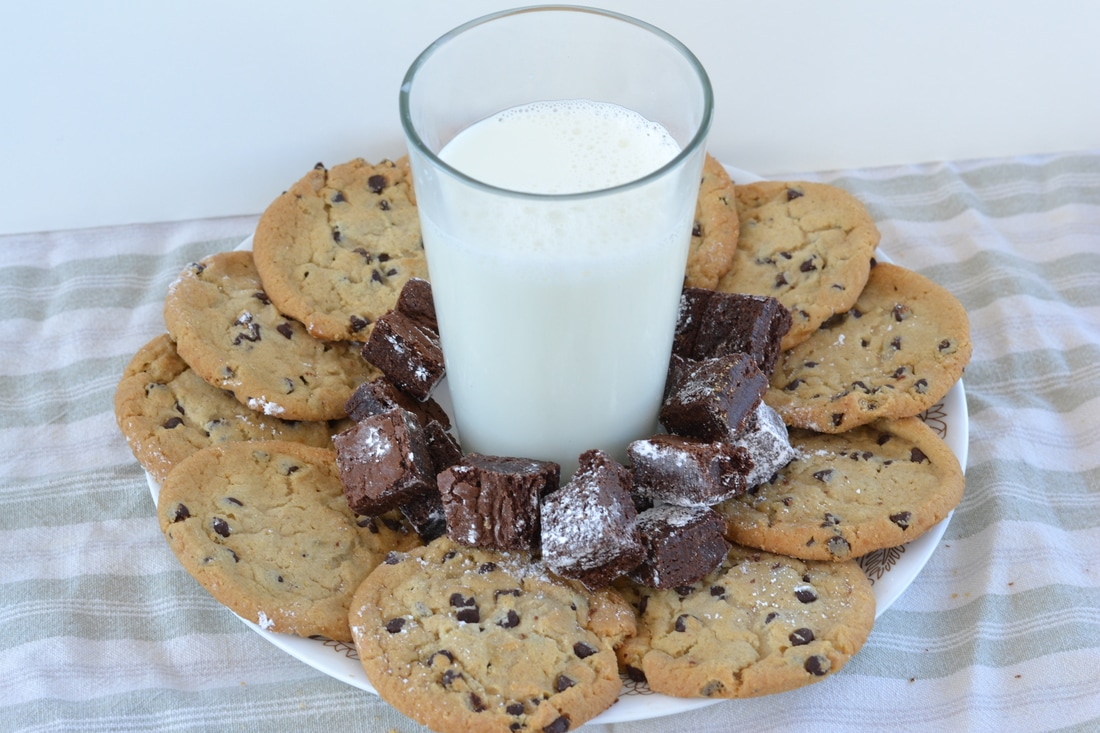
"PlateFull" ISO 400, Aperture f/8, Shutter Speed 1/50
ISO 400, Shutter Speed 1/80, Aperture 1/80
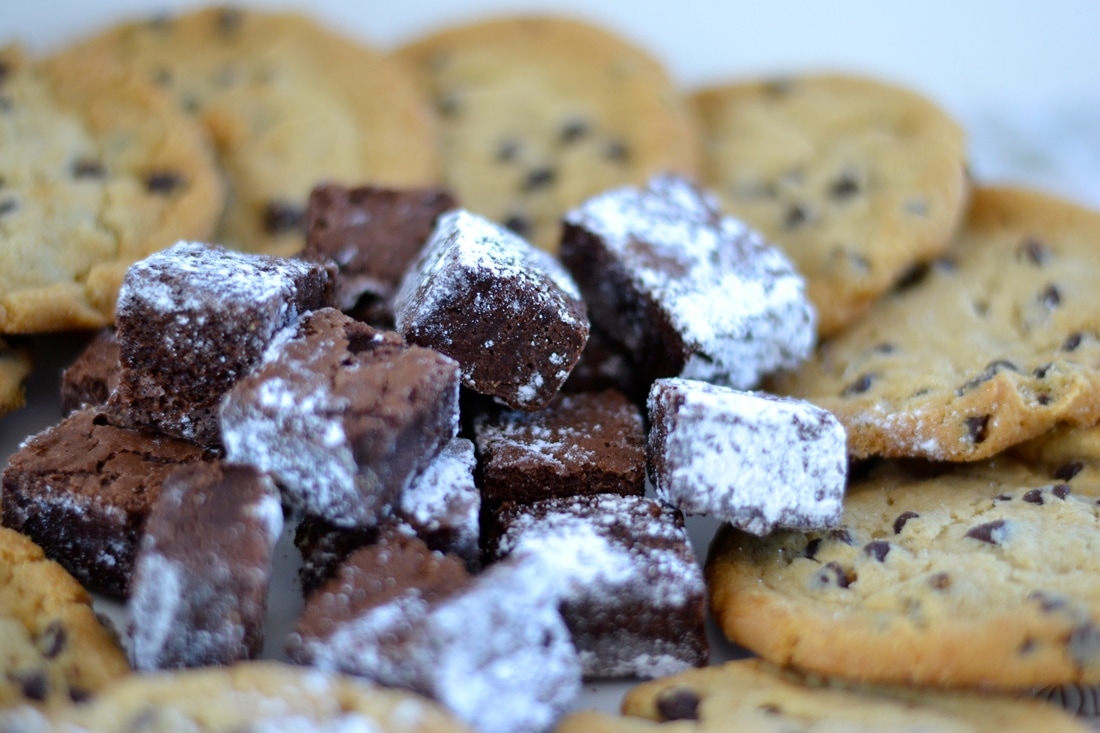
Aperture f/1.8, Shutter Speed 1/640, ISO 400
1. For this food project i brought milk, glass plate and dumb, cookies and brownies. To make this shot special I used a white large sheet to block the background and used a clothe to place under the plate.
2. Five things I have learned from this projects were, how to place your objects in a specific way to make it look in better angles, how to use the light reflector to bring in light, also to take better pictures with different apertures, also how the pictures look good when you zoom in and your food looks even better.
3. I moved my camera in different angles and zoomed in and out just like Nellis Heffer's photos.
4. Three things that i have learned from food photography was who good food look just by looking at it from a picture, better details, and how good your food looks with perfect lighting and the way you place it.
5. Some careers or businesses that use food photography would be food experts, Mc Donalds, Chipotle, Wendys, etc..
6. I was successful in the way i took and placed the objects in different ways to make it look more mouth watering. I think I failed on probably getting one shot with getting some one in action with the food.
Name Project
1.In order to complete this process you first go outside and get as many shots of your letter in objects and once done open up iPhoto, crop the excess parts out of your photograph and make the images black and white after. Once done open up Photoshop and place your images into the white template with the number of how many letters you have. With the blue guidelines place each photo in to each square and you might have to re arrange or reside them. Finally place you work into your class common drive and then to your own website.
2. I was unclear about how to get the template because the video was out of date, looking for my letters, and arranging them.
3.I was proud of actually managing my time on this project and finding my name outside.
4.I like the way my masterpiece looks because no one else has the same images.
5.I think i could of improved on maybe the I'm not sure.
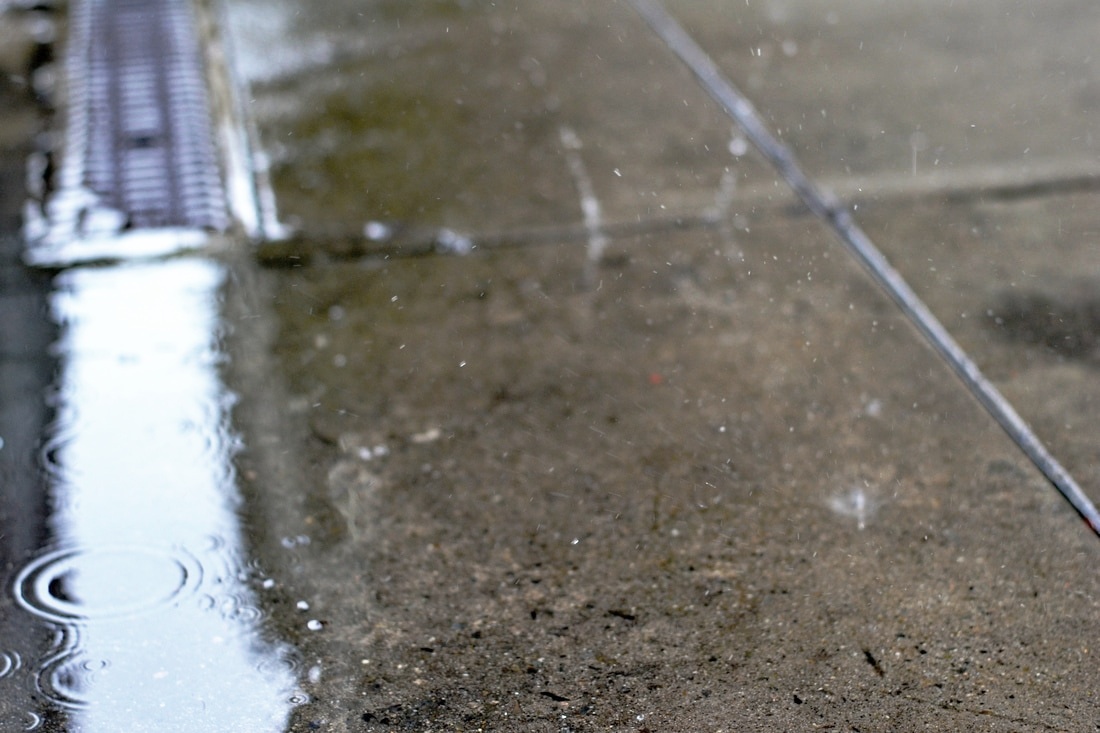
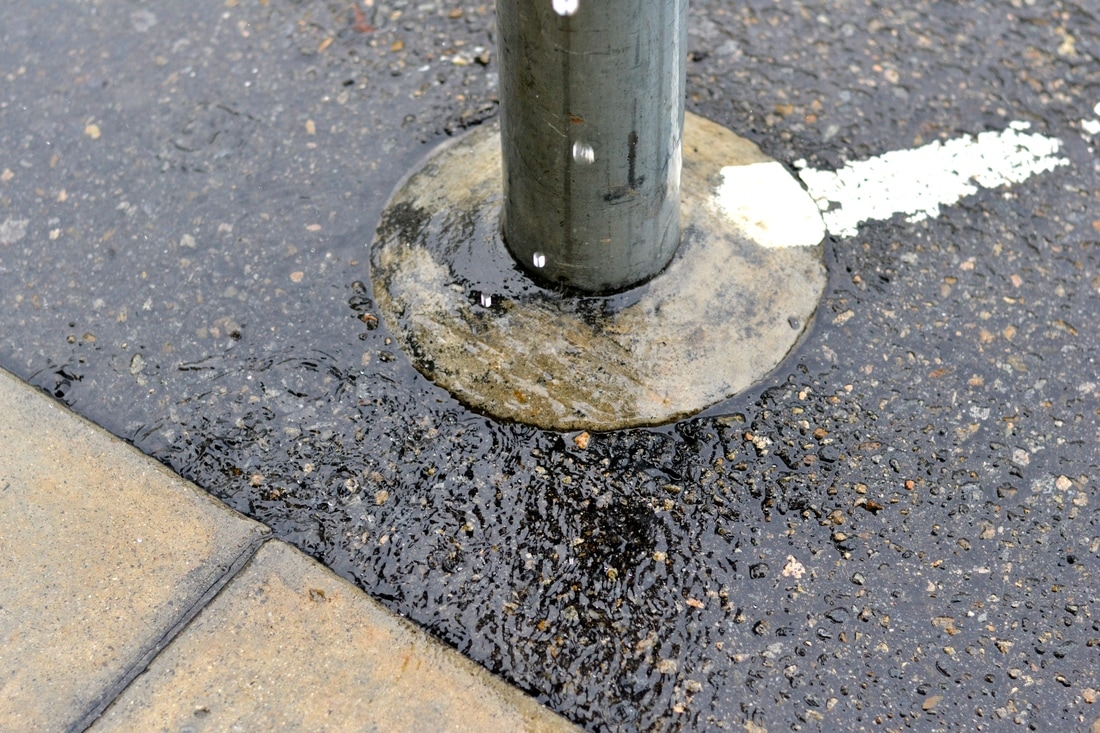
Rainy Day
Layer Masks

In the layers make above we had to put our face next to a celebrity we chose. For example, I chose to stack my face on top of Tyga's face and now I'm next to Kylie Jenner. I chose Kylie Jenner because who wouldn't wanna take a picture with her. We are on the red carpet in Hollywood,CA for photos.
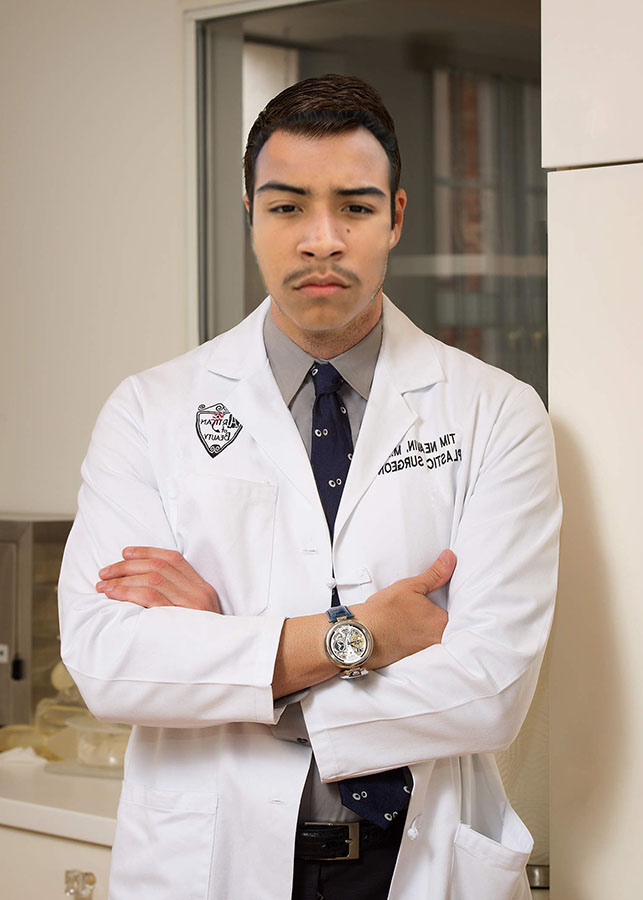
In the photo above we had to chose a career that would be us in our future in 10 years. My career is to be a Plastic Surgeon that is well known worldwide and help out other who are in need. I chose to be a plastic surgeon because when people mostly ask about what they wanna be you don't hear many people say they wanna be plastic surgeons. Being a Plastic Surgeon interests me because you help others out when they don't feel right about their body and you make them feel confident in their new body.
How To Use Layer Masks:
1. Chose two pictures that you'd like for thm to be layered for this project.
2. Once they are open in Photoshop, make sure that they are both 300 resolution by selecting
Image > Image Size. You want to be sure they are both that size so that the image is clear enough for printing.
3. Move the headshot image to the side of the Photoshop workspace by clicking on the title and dragging it to the side.
4. Use the lasso tool to select the head, neck and hair. Make sure that both ends of the lasso touch to get the marching ants. Move the lassoed image onto the Brad and Angelina photo by clicking on the MOVE tool and dragging it to the top of Angelina's face.
5. Change the OPACITY of the headshot by clicking by the thumbnails of the layers and change it to 60%.
6. Flip the headshot face to match the direction of Angelina's face by pressing EDIT> TRANSFORM > FLIP HORIZONTAL.
7. Change the scale as needed to make it bigger or smaller by pressing EDIT > TRANSFORM > SCALE. Press the "SHIFT" button while you are using the SCALE tool so that the proportions stay the same.
8. Change the rotation as needed to make the chin fit better by pressing EDIT > TRANSFORM > ROTATE
9. Change the opacity of the top layer back to 100% by going back to the layer thumbnails.
10. Select the MASK tool at the bottom of the layer thumbnails- it looks like a rectangle with a circle in it. Be sure that there are now TWO thumbnails in the top layer.
HDR Procedure
After: Before:
CROP- ISO 100, Aperture f/16, Shutter Speed 1/30
|
|
In order to take a photo like this photo, you first find a plants and zoom in and take five different photos using
Symmetry- ISO 200, Aperture f/16, Shutter Speed 1/20
|
|
Rule of Third- ISO 200, Aperture f/16, Shutter Speed 1/6
|
|
Leading Line- ISO 200, Aperture f/16, Shutter Speed 1/20
|
|
Frame- ISO 200, Aperture f/16, Shutter Speed 1/3
How to take an HDR Picture; Hold the plus and minus button, then you got negative -0.5 then -1.05. Then you got posotive +0.5 then +1.05. After you go to Photoshop and open it up and collide the five photos and take off ghosts.
|
|
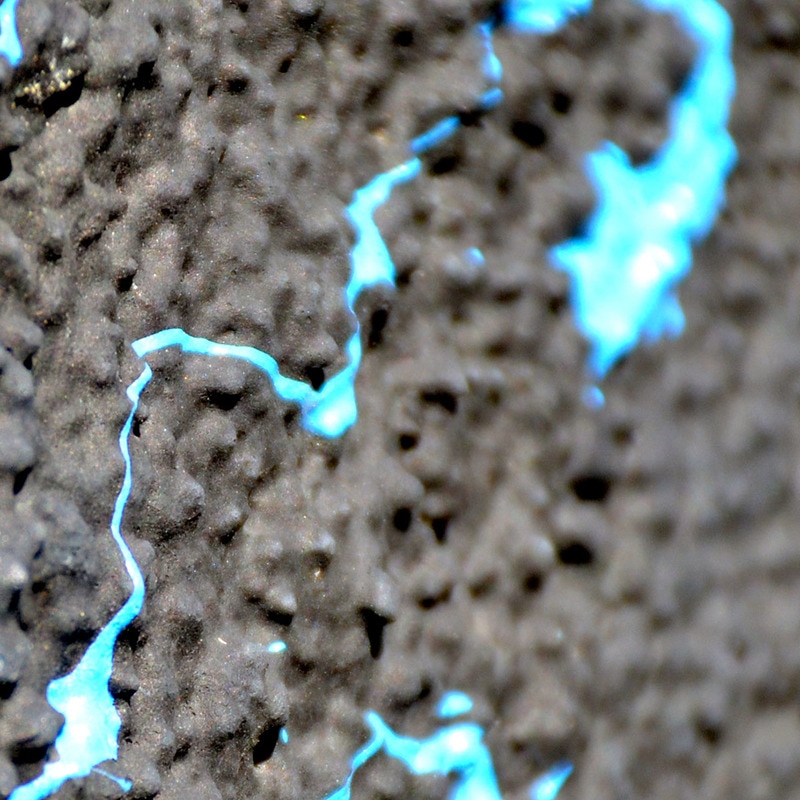
Artist As Mentor
Super Moon
To photograph the moon:
1. Use a tripod! A flat surface will only allow you to shoot straight, and shooting the moon means that you'll be shooting up and constantly re-adjusting the tripod as the moon moves throughout the night.
2. Use a shutter release cord, remote or the camera's self timer if you don't have one, so that you don't move the camera when pressing the shutter release during a long exposure.
3. Use a zoom lens and zoom in as much as you can to the moon. It's okay if it's not a super fancy lens, this was shot using a 15 year old $100 lens. Focus in on the craters and details on the moon.
4. ISO 1250- 1600, so that you can use as fast a shutter speed as you can without losing detail-the longer the shutter speed, the more chances you have the camera will shake even slightly in the wind, resulting in an out of focus photograph.
5. Aperture priority of f/5.6 since you are not worried about capturing any details other then the moon.
6. Bracket your exposure, meaning over expose and underexpose the photograph from what the camera is telling you. Generally the camera will overexpose the moon, so you'll get nothing but a white blob in the sky. Use the exposure compensation button (the +/- button below the shutter release) and change the exposure to -0.5, then -1.0, then -1.5 and so on, until you start seeing detail in the moon. You may go as far as -5.0 exposure compensation to get what you need.
7. Take a fair amount of photos and keep refocusing as the night progresses. The photographs may look focused on the camera's display, but you won't really see if they're completely in focus until you upload them onto your computer screen.
Halloween 2016
ISO 400, Aperture f/8, Shutter Speed 1/40
ISO 400, Aperture f/8, Shutter Speed 1/100
Principles of Art
Aperture f/8, Shutter Speed 1/160, ISO 400
Emphasis- Aperture f/8, Shutter Speed 1/1250, ISO 400
This photo represents balance because there is equal amount of things on each side.
 Variety-Aperture f/8, Shutter Speed 1/160, ISO 400
f/8, Shutter Speed 1/160, ISO 400

Proportion- ISO 400, Aperture f/8, Shutter Speed 1/800
This photo represents proportion because the tre is taller than (ruby) the girl on the floor standing next to it.
Emphasis- ISO 400, Aperture f/8, Shutter Speed 1/500
This photo represents emphaisis because it makes the girl's blue eyes stand out in the picture.
Variety-Aperture f/8, Shutter Speed 1/160, ISO 4000
This photo represents variety because it has different colors and elemnts into this photo.
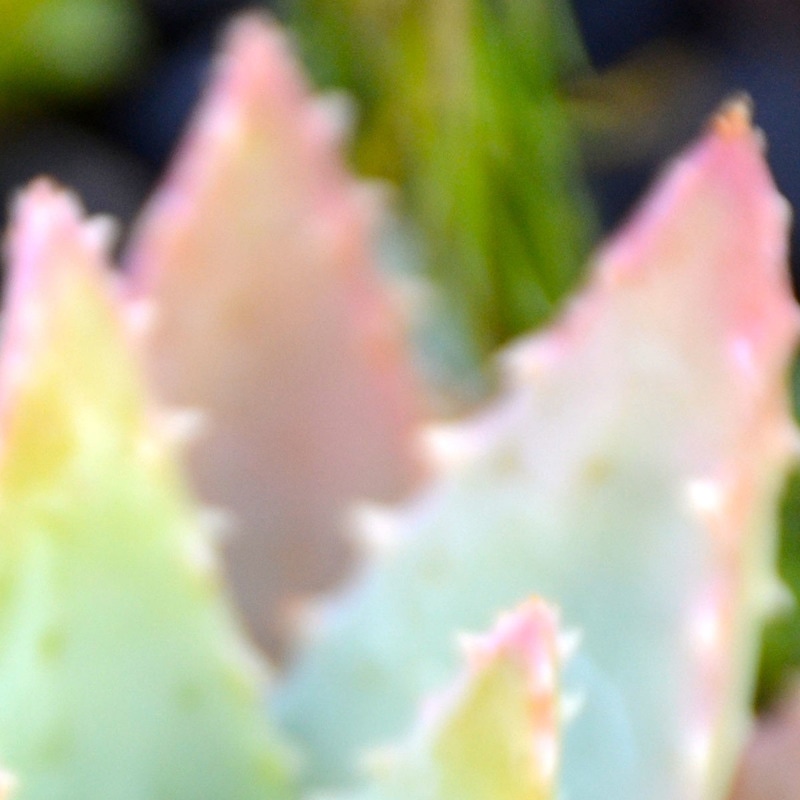
Elements of Art
ISO 400, Aperture f/8, Shutter Speed 1/1000
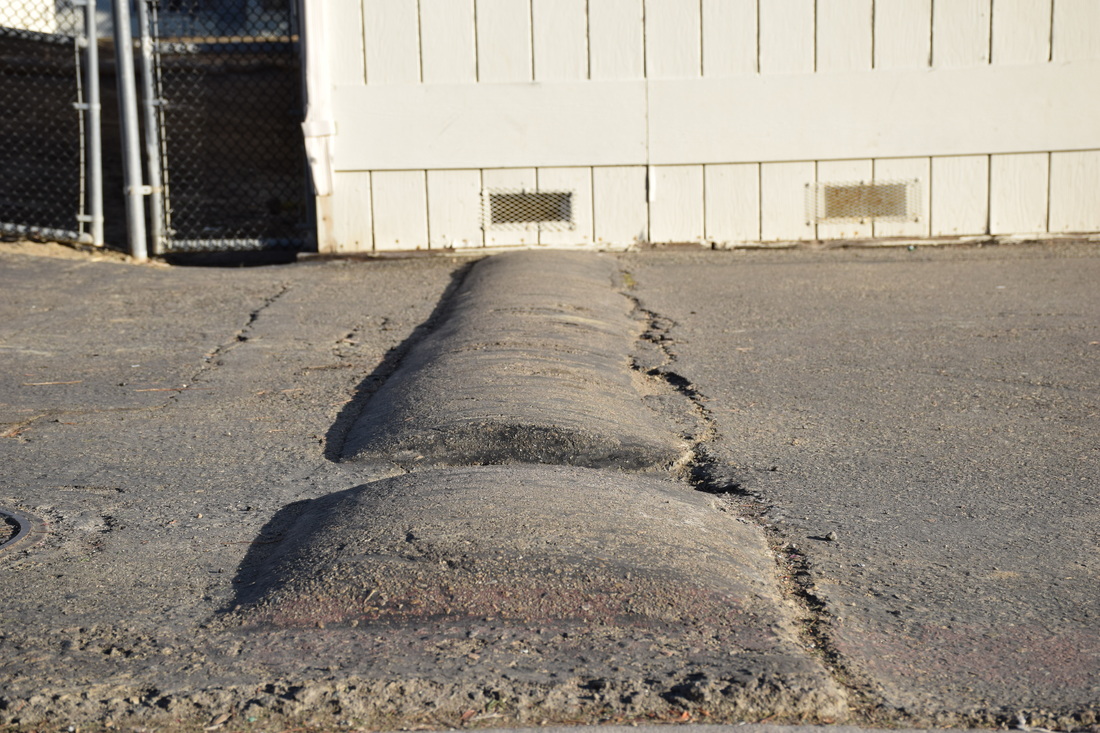
This photo was taken at the 800s wing and it features a bump on the road. The element in this picture is line and you can tell by the bump on the road is avertible line. This makes this photograph successful because its a line on the road.
ISO 400, Aperture f/8, Shutter Speed 1/4000
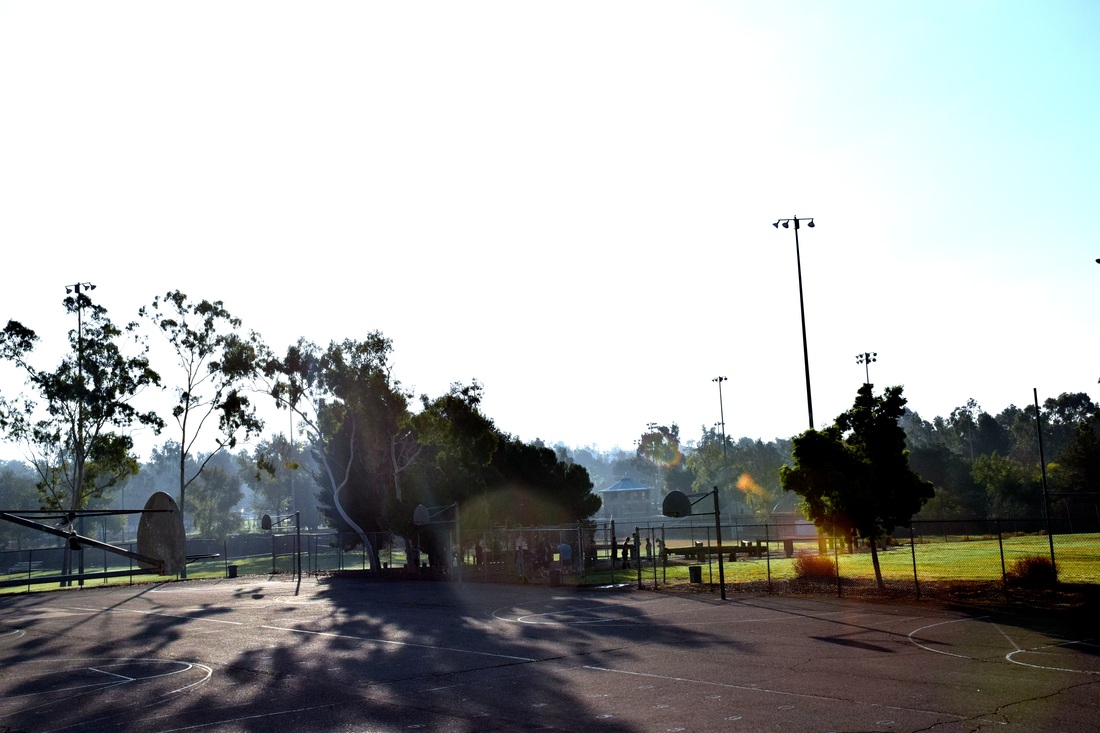
This photo represents form because it has rigid mountains in the back, has trees everywhere and sizes are big and small. This picture was taken by the tennis courts and baseball fields. This makes this photograph successful because it has a great landscape.
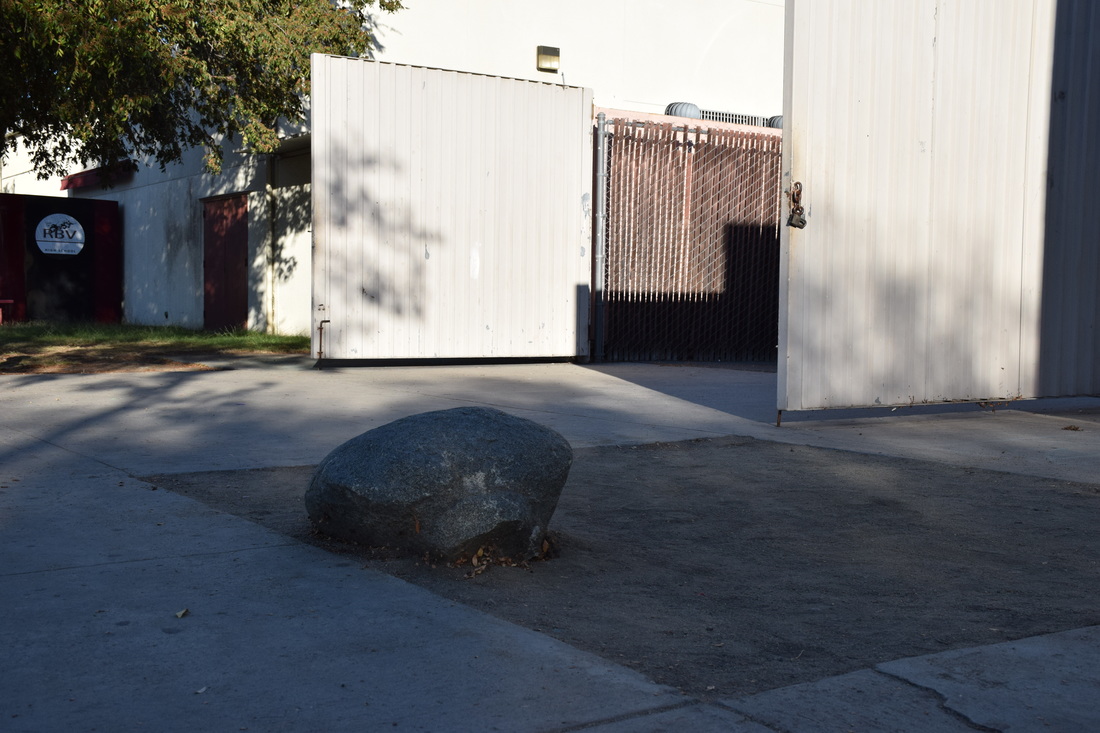
ISO 400, Aperture f/8, Shutter Speed 1/1250
This photo was taken by the weights room and features large rock sitting on the ground. The element in this photo is space because theres a rock in the middle surrounded by nothing. This picture is successful because theres lots of space around the rock.
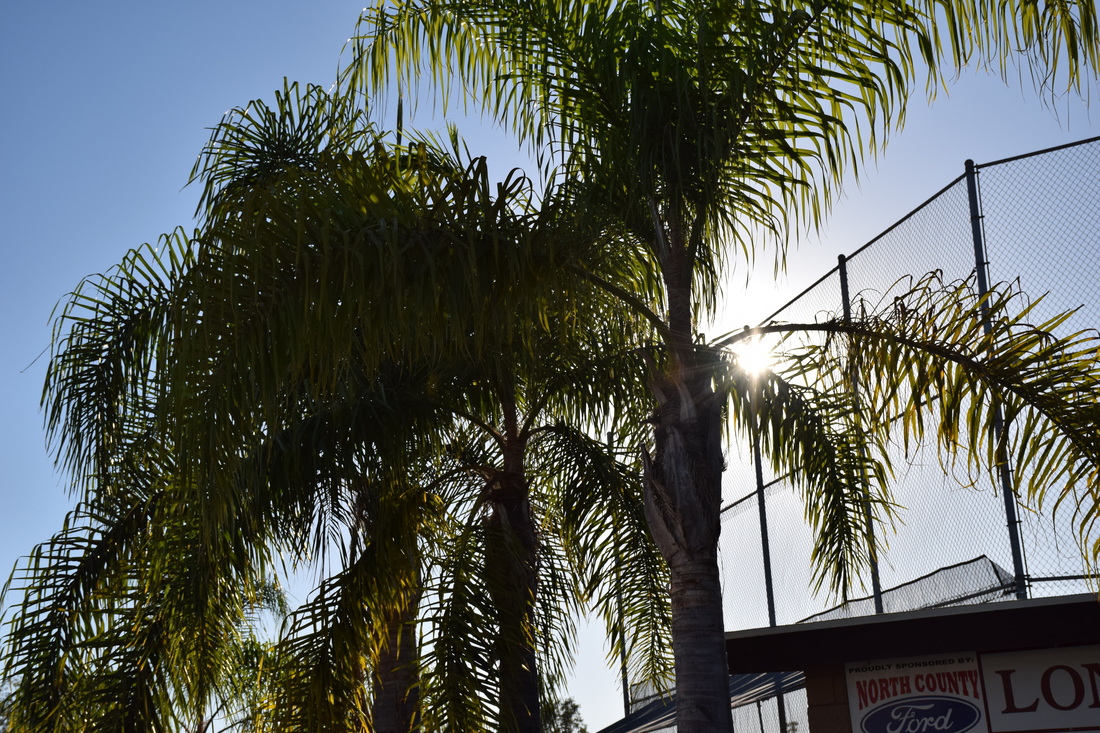
ISO 400, Aperture f/8, Shutter Speed 1/3200
This photo represents value because of the bright glowing palm trees turning dark because of the suns light hitting from the back. This photo was taken near the baseball field it has palm trees as the main object. This picture is successful because you can see value just by looking at it.
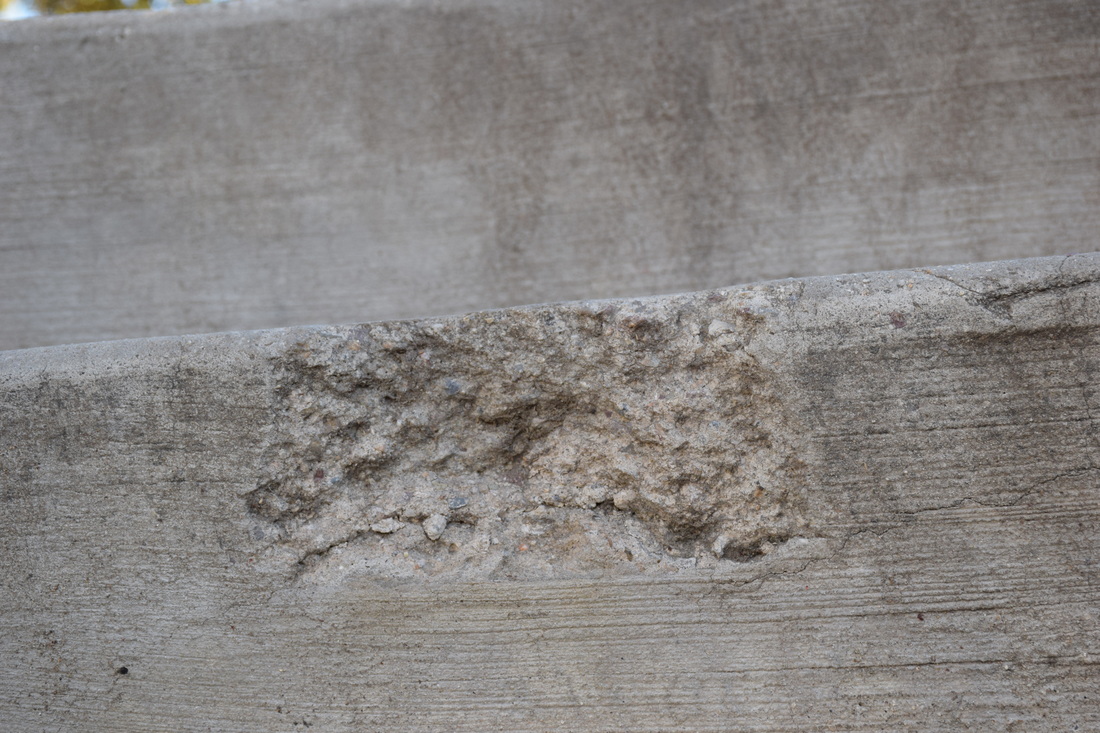
ISO 400, Aperture f/8, Shutter Speed 1/100
In the photo above features stairs made of cement that is chipped from the edge . The element in this photo is texture because you could touch the cement and you'd feel the rough and bumpy edges. This makes this picture successful because it represents texture.
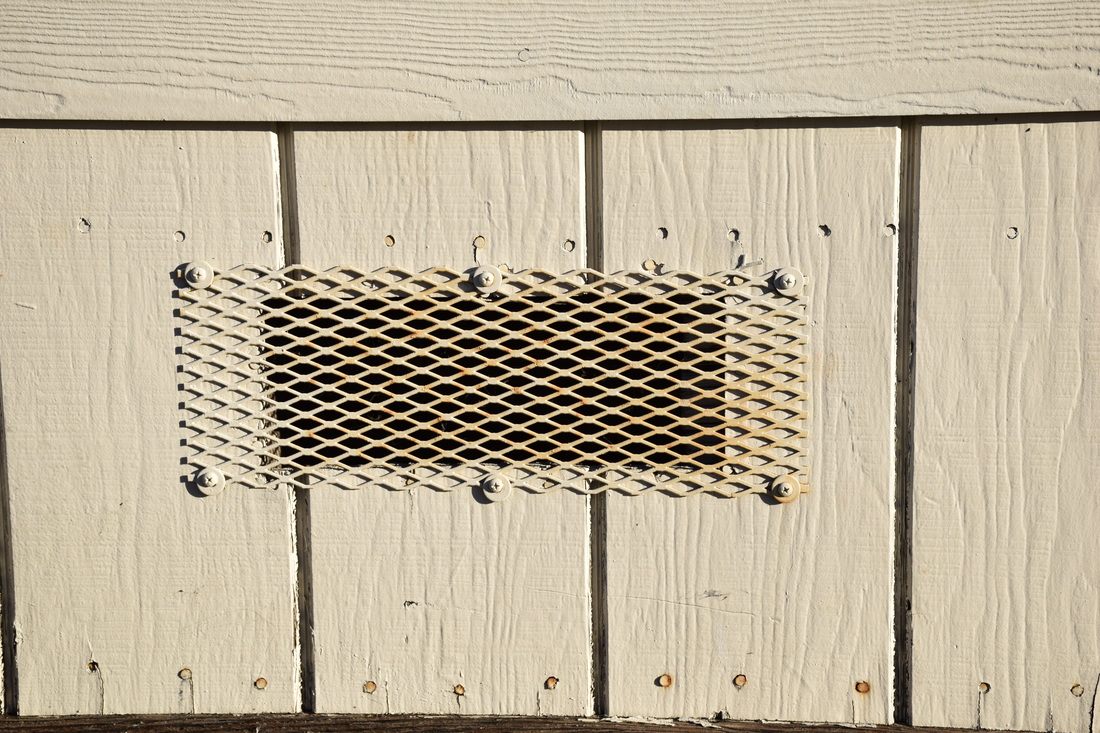
In this photo above above you could see an air vent on the side of a wall. The element in this photo is shape because you can see a rectangle and it has diamond shapes in the middle of it. This makes this photograph successful because it shows shape with in the object.
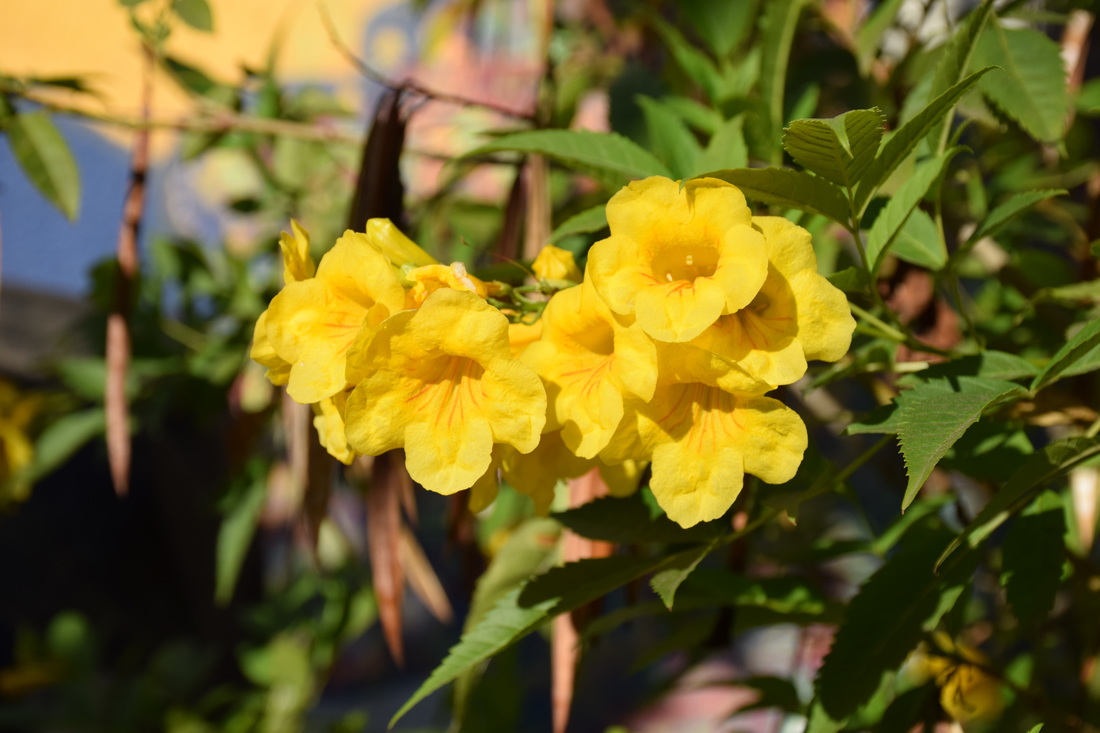
ISO 400, Aperture f/8, Shutter Speed 1/1600
In this photo you could see a bright a yellow flower with green leaves shining in the sun. The elements in this photo is color as you can tell by the flowers standing out and the background being blurred out. This makes the photograph successful because there is color in to the photo.
Elements and Principles of Art
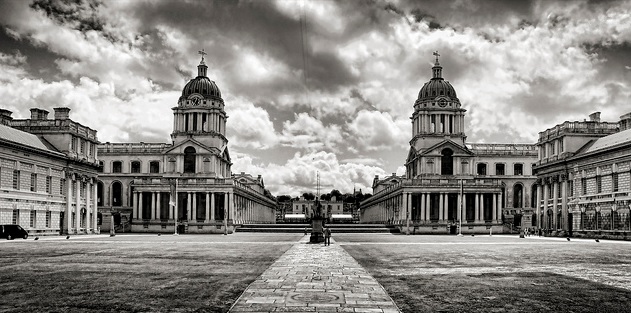
Nov 7, 2013-"balance"-Ad Geer- www.pinterest.com
In this photo it shows a old historical building
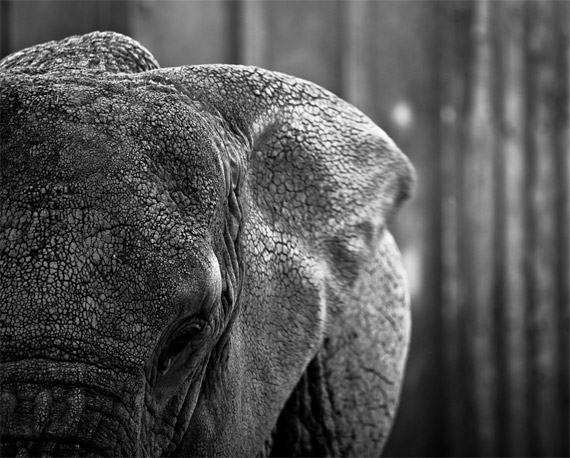
"Elephant"-Colby Johnson-www.picturecorrect.com
In this photograph
Benjamin Von Wong- Climate change doesn't care what's on the news- 06/16/2015- www.vonwong.com
This photograph shows space because there is a ma
June 2015-Javier Herrero- www.eyeem.com
This photograph shows harmony because it ha
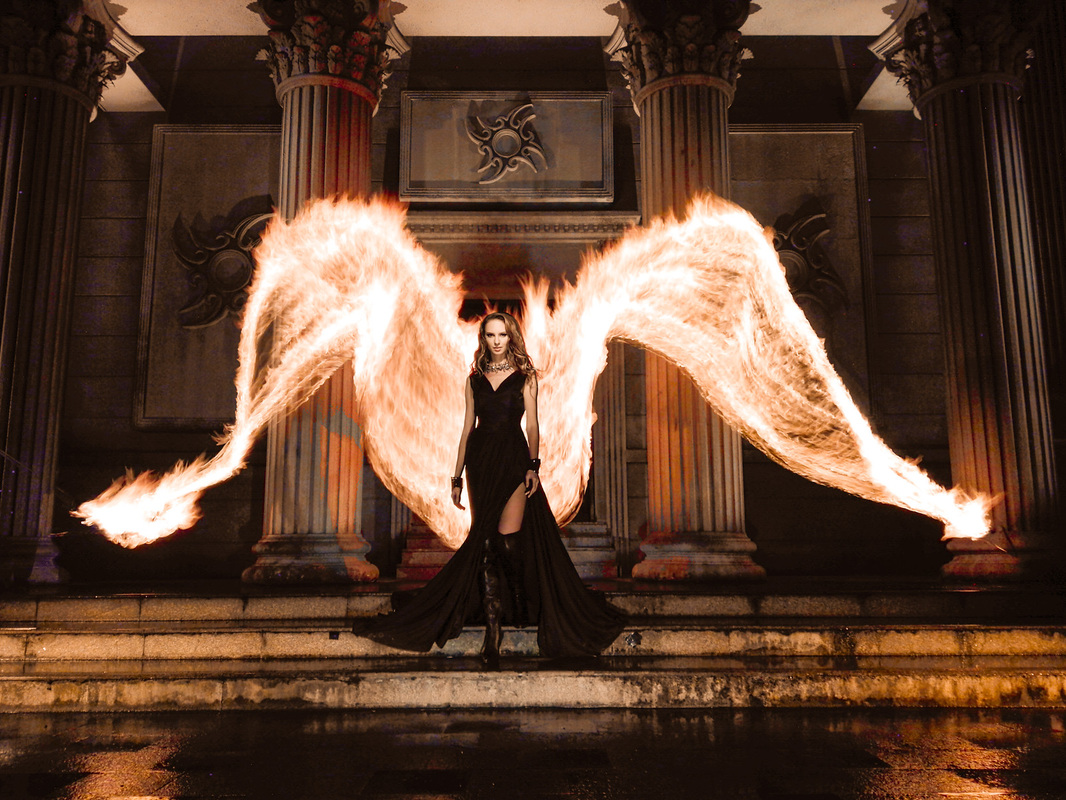
Benjamin Von Wong- Fire Angel- 01/28/2015- www.vonwong.com
This photograph shows value from one of the elements and principles. It has value in it because it shows the darkness and brightness from its surface. This photograph has brightness with in the models blonde hair and flames but also has darkness from the background scene which makes it successful.
The “building block” of design
- All good design will have one more of these elements; line,color,shape,form,texture,space, and value.
- This presentation aims to show you some illustrations
- Line- A one dimensional and can vary width,direction, and length. Lines also can define the edges of a form. Could be a horizontal,curved,straight or thick and thin.
- Color- Has three main characteristics; Hue(red,yellow,green) value(how light or dark it is) Intensity(how bright or dull it is)
- Shape- A two dimensional, with a height and width.
- Organic Shape;
- Form- A three dimensional, has height and width and depth. Emphasize form by the use of highlights and shadows.
- Texture- A visual tense to show you how it would feel like from looking at the picture.
- Space- A three dimensional, Space in a work of art refers to a feeling of depth or three dimensions. Positive Space- The space occupied by the primary object. Negative Space- The space around the object.
- Value- The lightness or darkness of a surface. It is frequently used when talking about shading but is also important.
- Principles of Art- Are the rules or guidelines of art. Used to organize or arrange the structural elements of design. Principles are balance, proportion, rhythm
- Balance- Similar to our physical sense of balance.
- Proportions- relates to the relative size and scale of various elements in a desig. Specifically, the relation between the objects.
- Rhythm- In an artwork indicates movement by the repetition of elements. Rhythm can make an artwork seem active.
- Emphasis- To make one part of an artwork dominant over the other parts. It attracts the viewer's eyes to a place of special importance in an artwork.
- Harmony- The pleasing quality achieved by different elements of a composition interacting to form a whole.
- Variety- Differences achieved by opposing, contrasting, changing, elaborating, or deversifying elements in a composition to add indivisualism and interests.
- Unity- The result of bringing the elements of art into the apprpiraite ratio between harmony and variety to achieve a sense of oneness.1
Fast Shutter Speed
ISO 1600, Aperture f/4, Shutter Speed 1/800
ISO 1600, Aperture f/4, Shutter Speed 1/1100
ISO 1600, Aperture f/4, Shutter Speed 1/800
ISO 1600, Aperture f/4, Shutter Speed 1/800
ISO 1600, Aperture f/4, Shutter Speed 1/1000
ISO 1600, Aperture f/4, Shutter Speed 1/1000

ISO 1600, Aperture f/4, Shutter Speed 1/1000
ISO 1600, Aperture f/4.5, Shutter Speed 1/1000
1. I took these shutter speed photographs using shutter speed 1/1000 second to capture the bursting motion of your photo.
2. The struggles in this process was not getting the right show because it was to late when the action happened. Another struggle was the angle and focus when taking the photo.
3. The top 3 things I learned in shutter speed were how to take the photo, correct the settings, and take better shots and angles.
4. You could use shutter speed when playing sports, running, fast moving animals or objects.
Respect
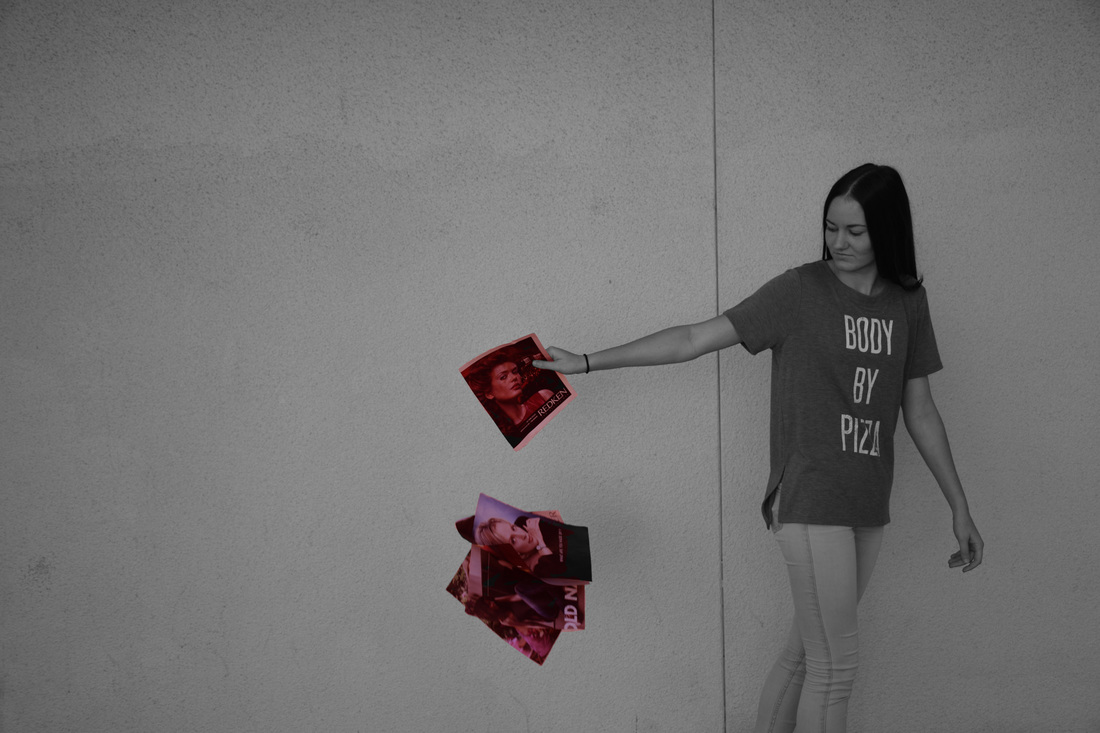
For red ribbon week we had to come up with four different ideas that represented better choices instead of using alcohol or drugs. The picture will be entered in the Red Ribbon contest and will be seen by judges to see who would win. Therefore, I took four different pictures and chose one of them. The picture was edited on Photoshop and highlighted the area that represented the good of the picture with red color.
The picture I chose for the contest shows a teenage girl dropping magazines and walking away from them. She is dropping the magazines of models looking perfect because the images are false, fake, and photo shopped by photographers. The teenage girl is walking away with self-confident knowing she is perfect in her own body. You don’t have to be six feet tall and skinny to be beautiful. Everyone is good looking in there own way.
The picture I chose for the contest shows a teenage girl dropping magazines and walking away from them. She is dropping the magazines of models looking perfect because the images are false, fake, and photo shopped by photographers. The teenage girl is walking away with self-confident knowing she is perfect in her own body. You don’t have to be six feet tall and skinny to be beautiful. Everyone is good looking in there own way.
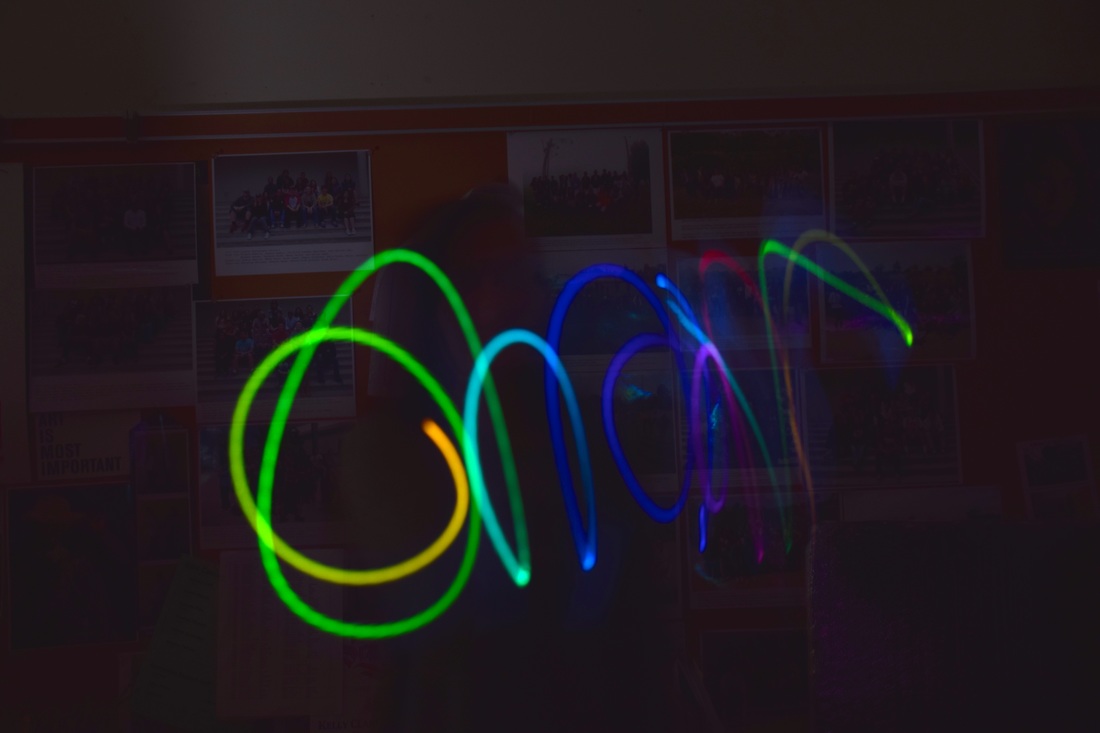
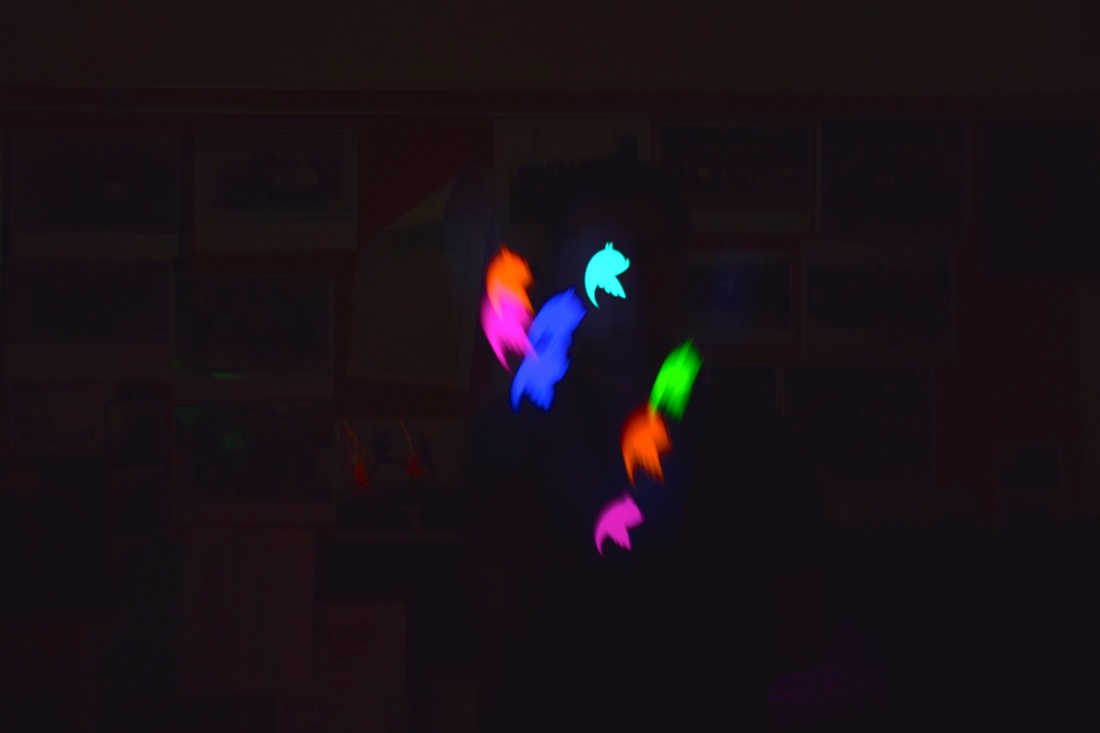
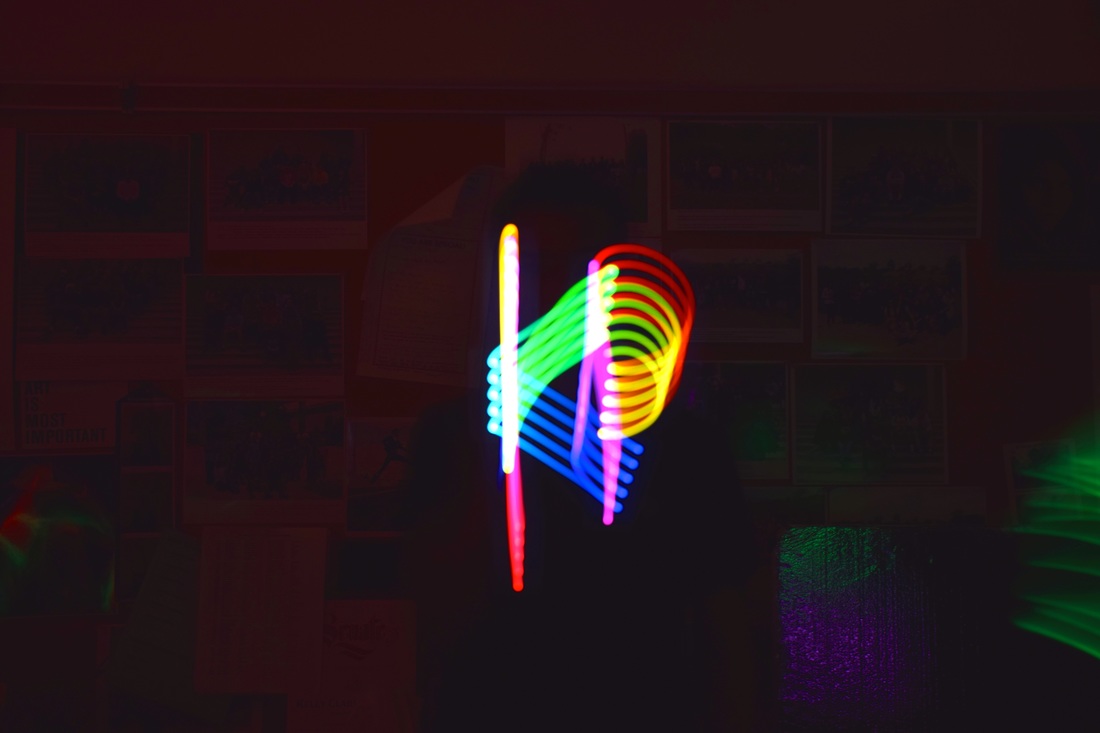
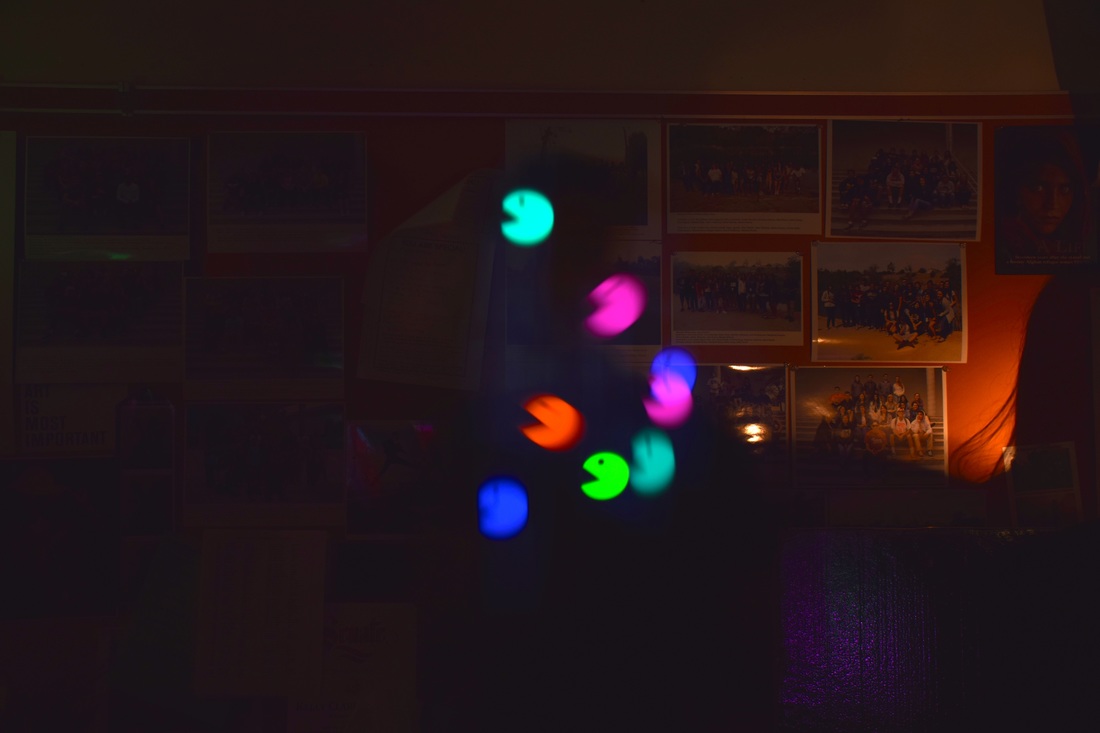
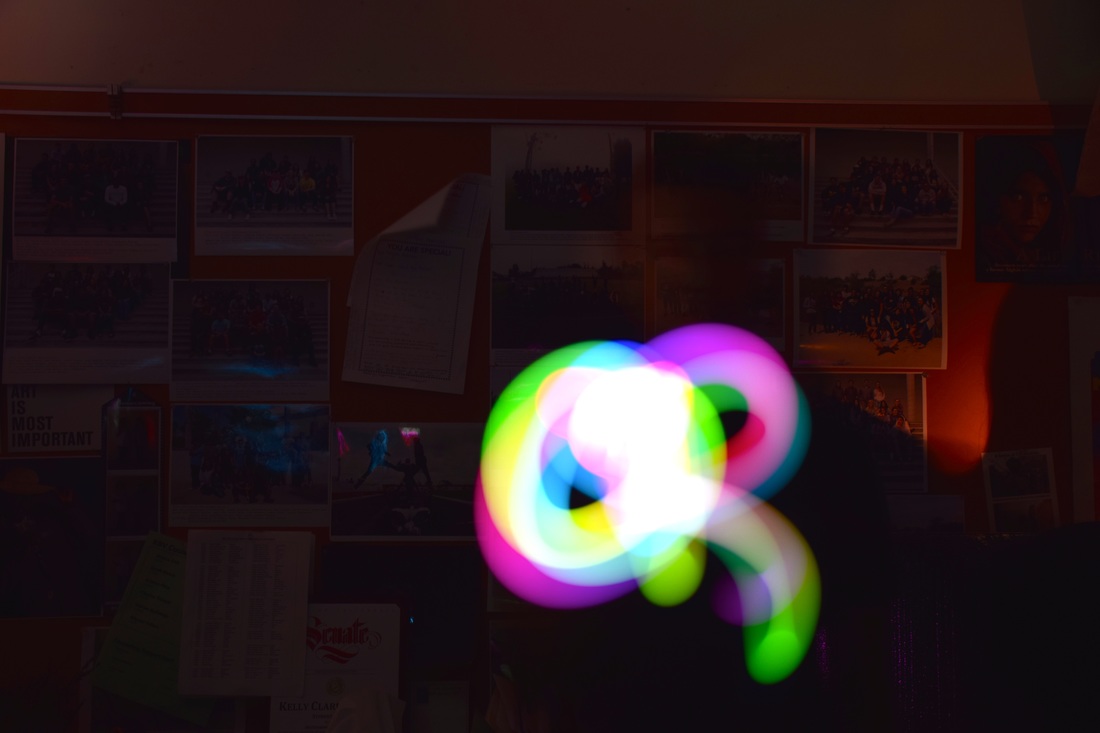
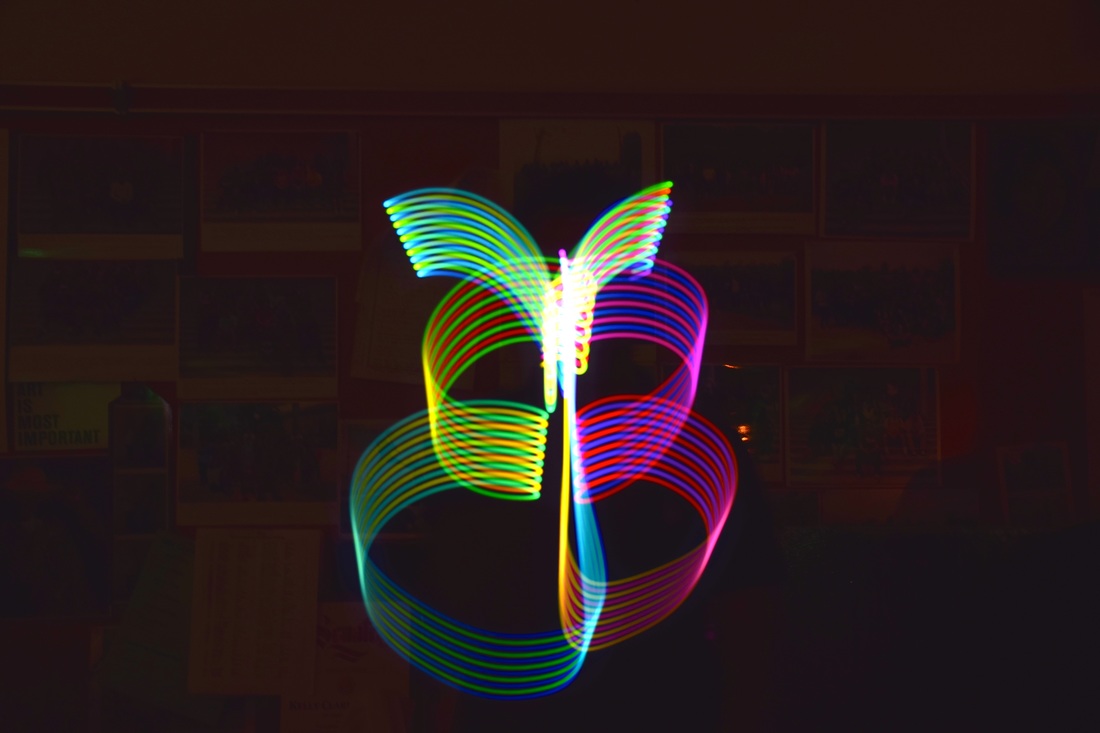
Light Paint
Shutter Speed 8.0, ISO 100, Aperture f/5.6
Shutter Speed 8.0, ISO 100, Aperture f/5.6
Shutter Speed 8.0, ISO 100, Aperture f/5.6
Shutter Speed 0.8, ISO 100, Aperture f/5.6
Shutter Speed 8.0, ISO 100, Aperture f/5.6
Shutter Speed 8.0, ISO 100, Aperture f/5.6
How Light Painting works-
1.In order for a light paint to work, the room your in must be dark with no light coming in. Then you either can have an app downloaded called "MyLightPaintFree" or you can use glowsticks. I recommend buying this app because it has different designs you can use. Make sure you have your camera on a 6 second shot and press the shoot button.
2. There we no struggles in this project all you have to do is click the button.
3. I learned how to do a light painting and how a camera can do this.
4. some ideas you could do with this project would make a sign or note and send to a friend,lover, or a special person.
Shutter Speed
Shutter speed 1/30, ISO 100, Aperture f/11
Shutter Speed 1/1000, ISO 100, Aperture f/1.8
Shutter Speed 1/250, ISO 100, Aperture f/3.3
To change the shutter speed on your camera, make sure your camera mode is on "s" and the use the dial or knob till you get the shutter speed you want. Fast shutter speeds can make normal subjects appear to freeze in the air, therefore you see people floating the air. I would use shutter speed as a priority because it captures movements when in action and it can make your photo look frozen in motion.
Shutter Speed Notes:
Shutter Speed Notes:
- Shutter speeds are both technical and aesthetic choice a photographer needs to make before releasing the shutter.
- The shutter inside our camera controls the duration of time the sensor is exposed to light.
- blur or motion in your photography can emphasize movement and add drama
- A fast shutter speed is often utilized to freeze the movement of the subject.
- A slower shutter speed can be used to show motion and visualize movement
- Shutter speeds are expressed as seconds or fractions of seconds.
- As a general rule to prevent unintentional camera shake you avoid hand holding your digital cameras at shutter speeds lower than
- Using a tripod can help eliminate camera shake when using
- The visual blur and suggestion of movement occurs
- Layering motion of different subjects moving different directions at different speeds can set up interesting dynamics within a photograph.
- Fast shutter speeds can make normal subjects appear to freeze in the air.
- When photographing people running relatively close to the camera shutter speed of 1/1000 second or faster should freeze most motion
- The distance the subject is to the camera, the speed of the subject and the focal length of the lens will affect whether the subject is sharp or blurred
- Slower shutter speeds can help convey the idea of motion and movement.
- Slower shutter speeds combined with panning can help isolate the subject from a busy and distracting background
- A tripod combined with long exposure can capture the fireworks trails
- Water movement can be emphasized with long exposures
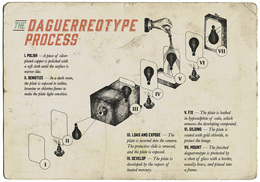
Daguerreotype and Cyanotype
|
Daguerreotype- A photograph taken by an early photographic process employing an iodine-sensitized silver plate and mercury vapor.
Cyanotype- A photographic blueprint
|
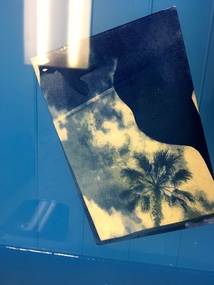
My Photo
|
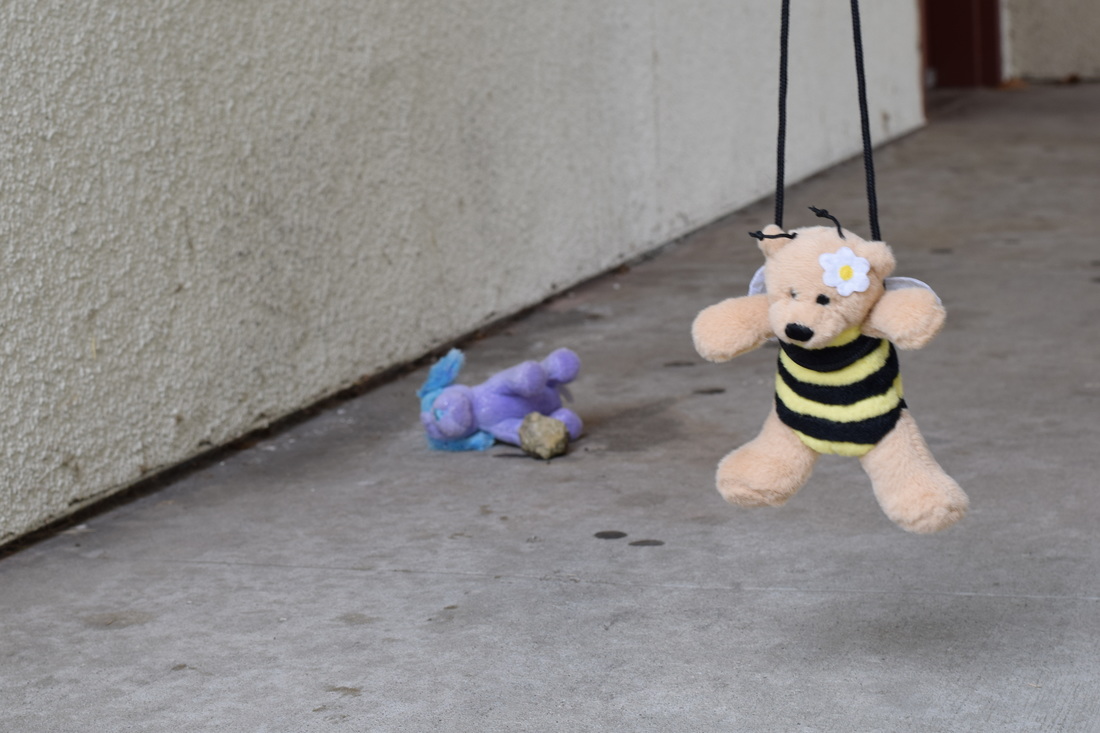
Toy Story: The Last Race
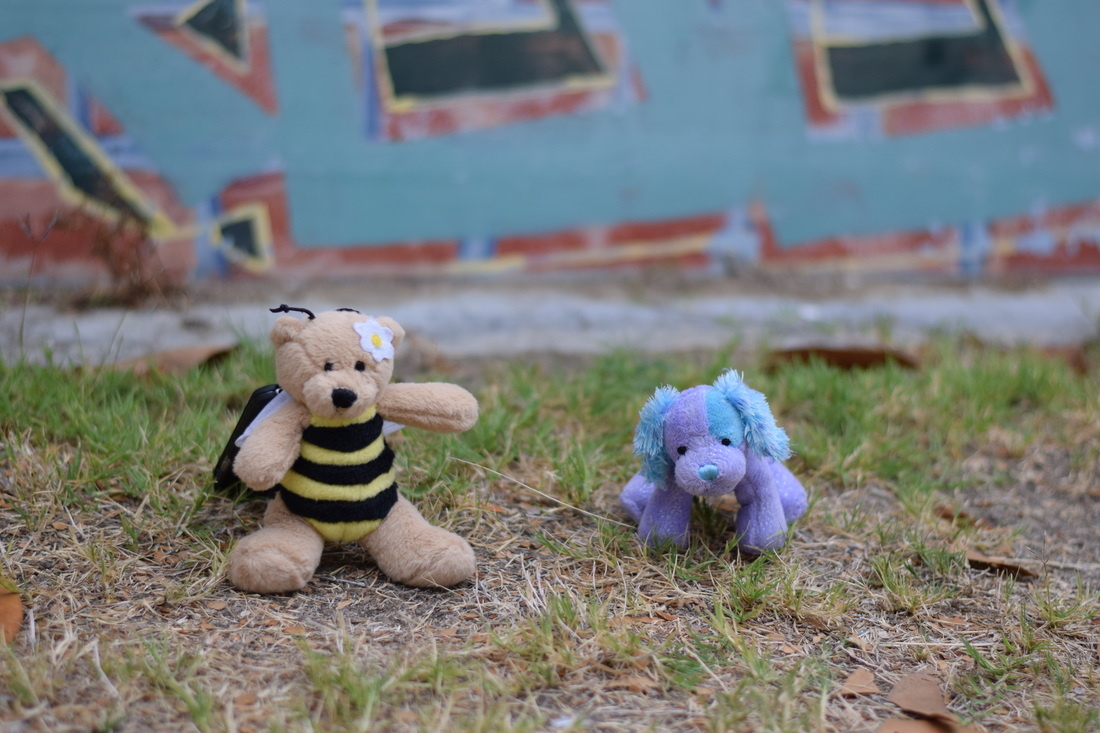
f/1.8, Shutter Speed 1/1600, ISO 400
It was the last day of summer and blueberry didn't want summer to end in a boring way. Britney (left) and Blueberry (right) are both heading to college and they both won't see each other until next year. They both have been competitive since they were young children. Blueberry would always win every time they would compete but now things will change.
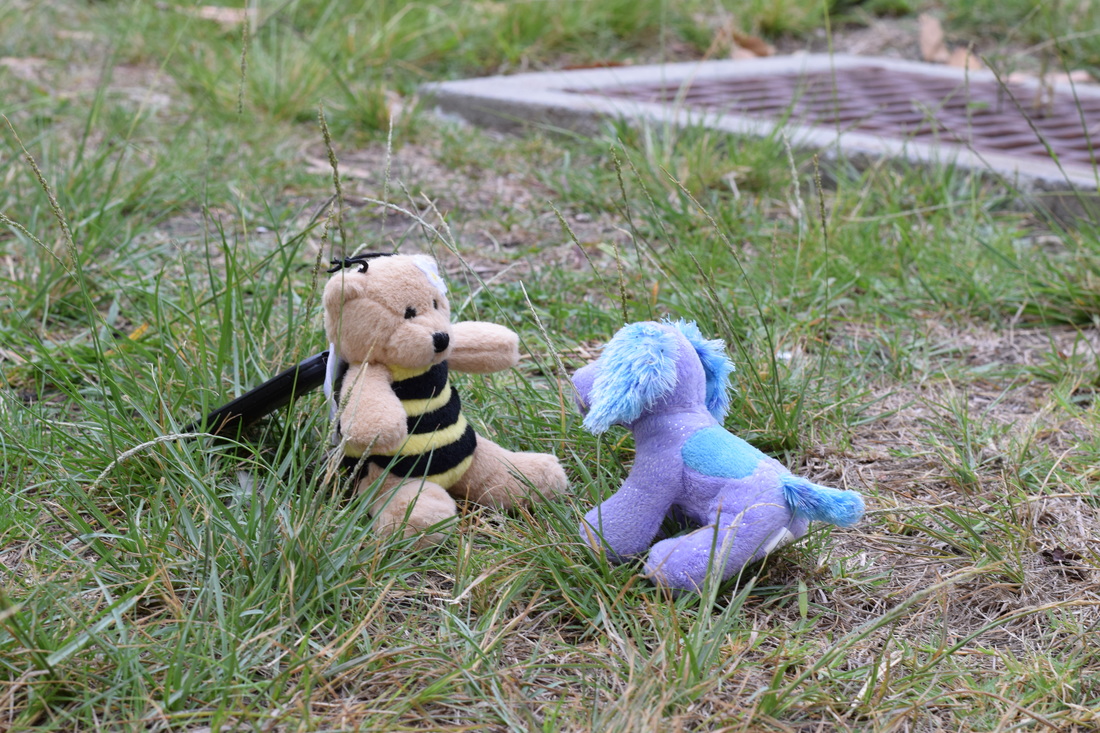
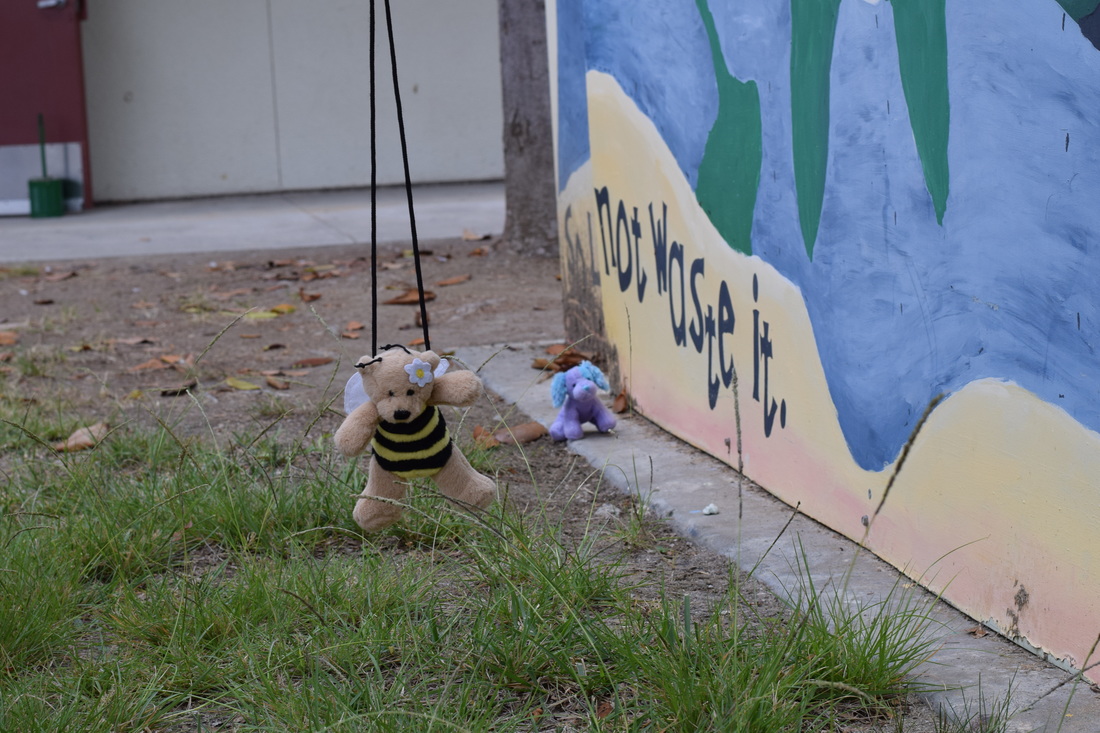
f/8, Shutter Speed 1/80, ISO 400
Britney and Blueberry both decide that they are going to have a race to see who will win for the the last time. Britney can fly with her wings and Blueberry can run with her 4 legs.. They both decide they are gonna race at their neighborhood park.
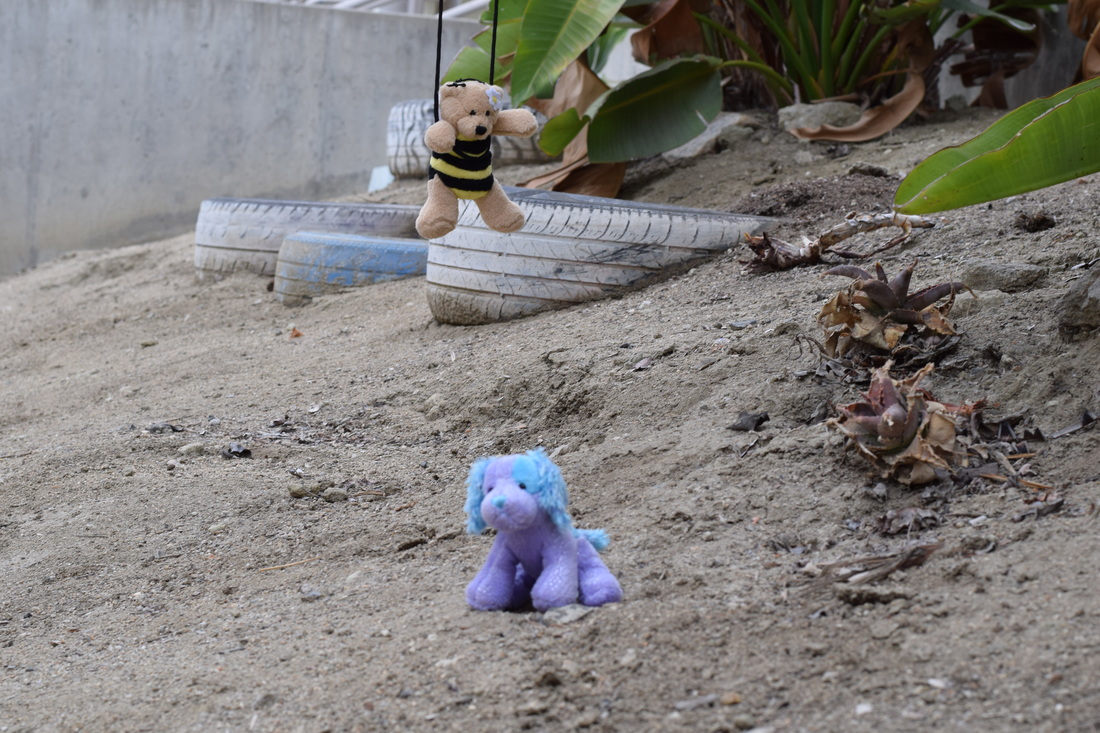
Aperture f/8, Shutter Speed 1/80, ISO 400
Blueberry has always been competitive every time she competes against another person. Blueberry sprints off rushing before the whistle. Britney unaware that blueberry already started she had to catch up as fast she can. Although blueberry is up in front, Britney knows she can win either ways.
Aperture f/8, Shutter Speed 1/30, ISO 400
With Blueberry in the lead she doesn't care about where she's running all she can think of at the moment is winning the race. Blueberry sees that Britney is catching up little by little. She then trips over a rock in her path way and tries to pick herself up. Britney speeds up since she sees that her competion is on the ground.
Aperture f/8, Shutter Speed 1/100, ISO 400
Finally Britney had the lead in first place. Britney quickly needed to decide if she should help and pick up blueberry or just leave her on the ground. Britney flies through the skies leaving her opponent on the ground. With Britney ahead , Blueberry rushes after her knowing she has to catch up in little time.
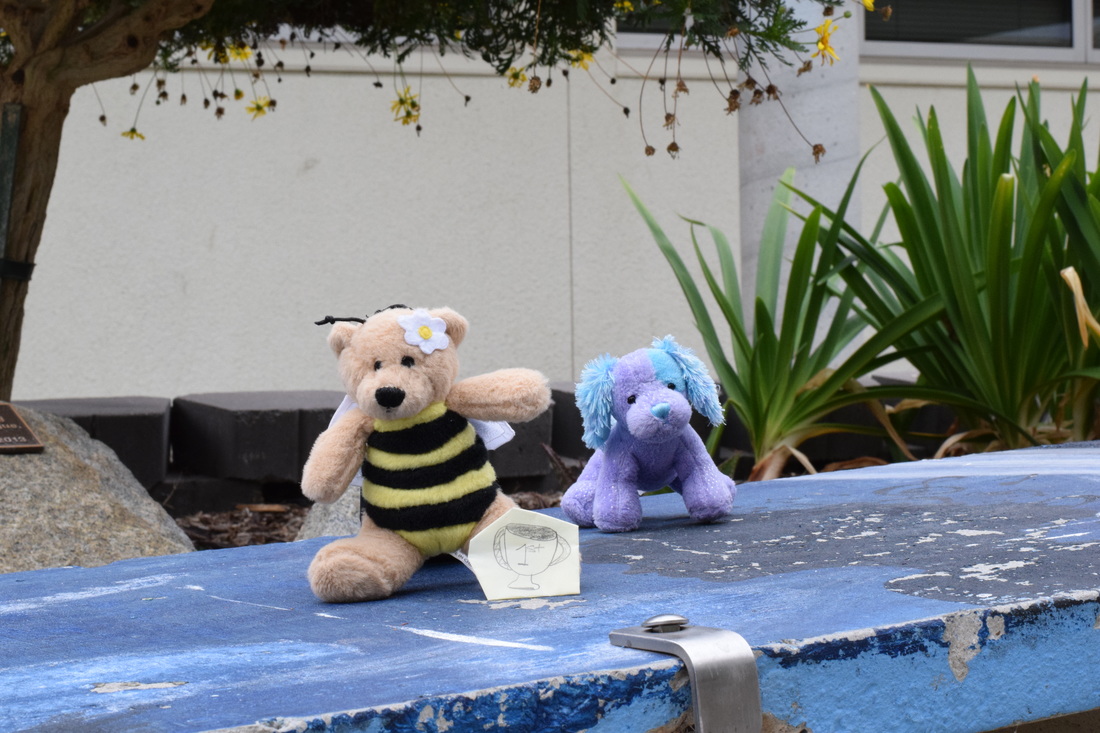
f/16, Shutter speed 1/160, ISO 1600
Britney for once wins the race against her sister. Blueberry was bummed out but was glad that her sister has omen. They both end up going they're own separate ways.
Aperture Priority
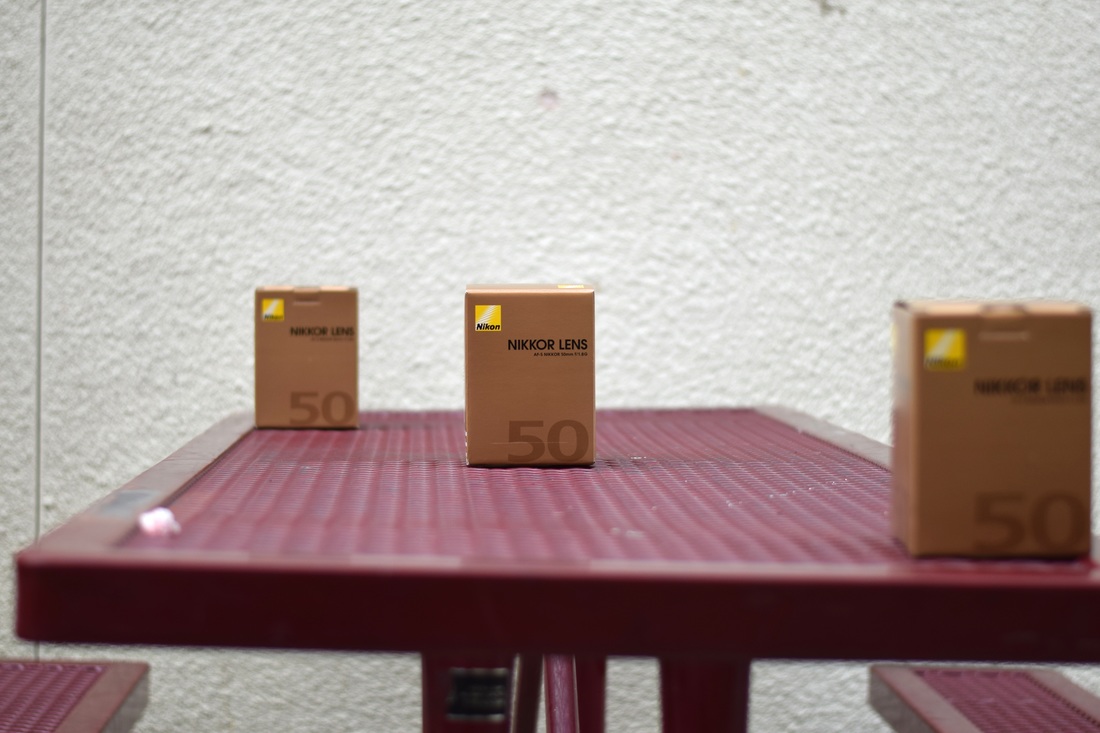
Aperture f/1.8, Shutter Speed 1/2000th of a second, ISO 200
|
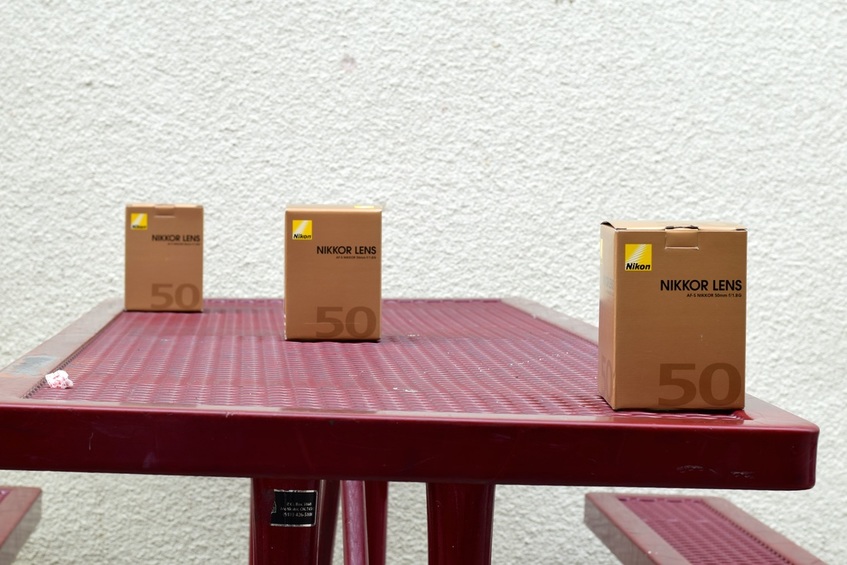
Aperture f/8 Shutter Speed 1/9th of a second, ISO 200
|
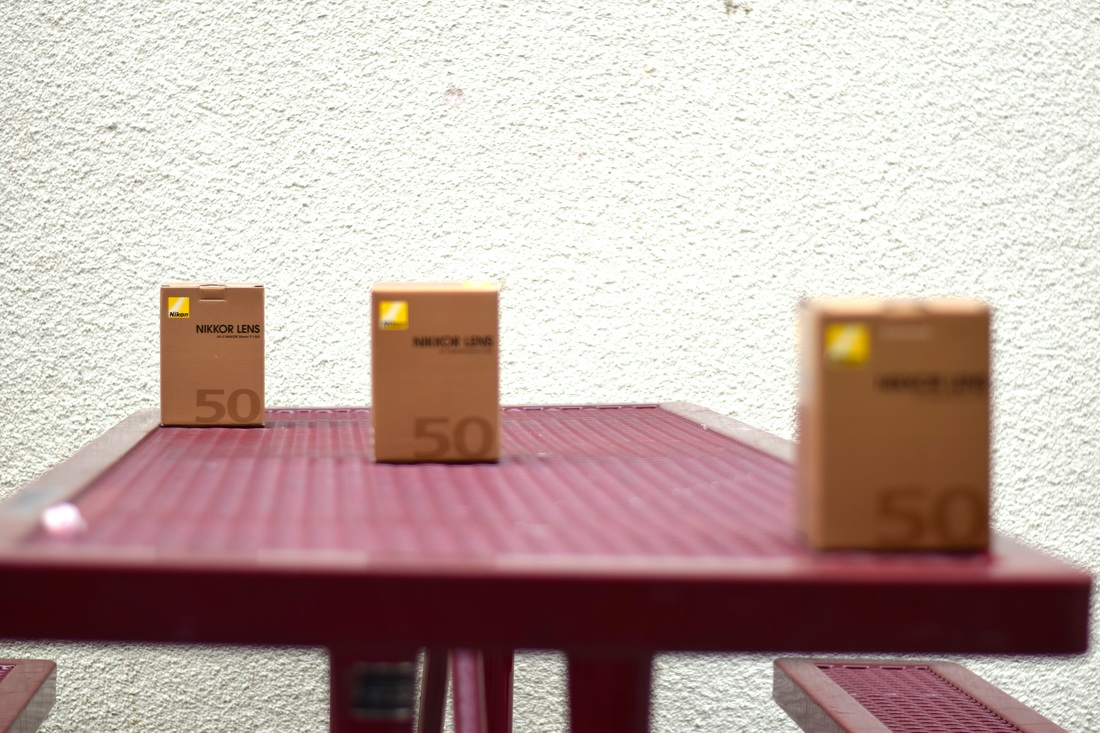
Aperture f/16, Shutter Speed 1/20th of a second, ISO 200
|
In the "Aperture Priotity" project we took picture of three boxes with different apertures. The f/1.8 aperture focuses on the middle box blurring the rear front and back boxes. The f/8 aperture focuses on all three boxes at the same time. The f/16 aperture focuses the left rear back box blurring the two front sides.
Digital Camera Basics
DSLR- A digital camera that uses mirrors to direct light from the lens to the view finder. Exposure is the amount of light collected by the sensor in your camera during a single picture.
- Almost all cameras today have light meters which measure the light in the given shot set and ideal exposure.
- These f-numbers are known as "f-stops" is a way of describing the size of the aperture is.
- A large aperature (high f/ numbers i.e. f/2.8) softens background details.
- A small aperature high f/ numbers i.e. f/220 increases the depth field, bringing both\
- If the shutter speed is fast, it can help to freeze the image completely.
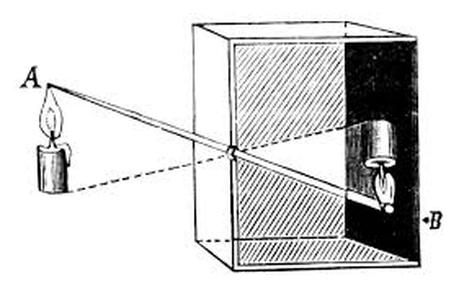
Camera Obscura
|
|
What is a camera obscure? The two photos above show and explain how a obscure works. A camera obscure works by using a black box, dark in the inside and a hole that lets light come in. when the light touches the inside of the box it shows the image that you see outside except upside-down.
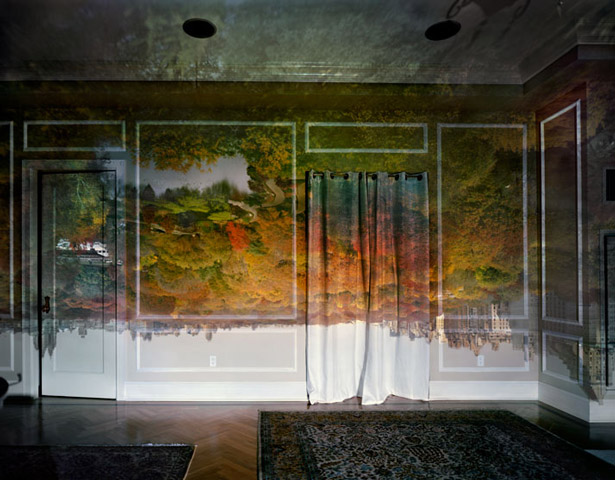
Surrealistic Selfie
For my surreal self portrait project I used two photos. I used two apps for my project and they called Pixlr and snapseed. Pixlr and Snapseed were not easy to control but I still managed to use them well. Snapseed was alright to use but Pixlr was the best to make your photos look even better.
The first photo I used was me sitting down on the bench. This photo was taken during period 2 in the halls by my friend Shayna Perez. This photo shows a teenage man looking into his future deeply imbedded into his goals. I used snapseed for the filter I added and it shows the sun’s rays coming down. It really makes the white and colors stand out in the picture.
In my second picture I used was me hiking in San Marcos. I like to be active and hang out with friends. For this picture I shot it on my iPhone 6s and I used the Pixlr app for this picture. In the “hiking” photo it shows a creek type water flow going down and looking into the views. Together I put both photos in top of each other and now it has a cool look to both pictures.
